

Table of Contents
- Understand Your Space and Vision
- How to Design Custom Wall Art Using an AI Wall Art Generator
- Prepare High Resolution Art for Printing
- Wall Art Layout Ideas and Composition
- Select Materials, Frames, and Mounting Hardware
- Customize Your Design and Finalize
- Conclusion
Last Updated: August 26, 2026
Understand Your Space and Vision
Before selecting designs or materials, understand what you're working with. Your space dictates everything: artwork size, color palette, and mood. Walk through the room at different times of day and notice how light hits the walls. Look at existing furniture, flooring, and decor. Are you drawn to minimalist aesthetics or maximalist gallery walls? Should the art blend in or make a bold statement?
The best custom wall art completes its environment. Think about the room's purpose: a bedroom needs something calming, an office needs something inspiring, a living room might call for a conversation starter. Consider wall dimensions carefully. Measure height and width, and note architectural elements like windows, doors, fireplaces, or shelving that affect layout. These constraints become design parameters that actually improve the final result.

How to Design Custom Wall Art Using an AI Wall Art Generator
An AI wall art generator transforms your imagination into designs in minutes. Rather than hiring an illustrator or sketching for weeks, you describe what you want and let the AI handle the visual execution. Tools powered by DALL-E 3 technology generate high-resolution artwork from natural language prompts, letting you be as specific or abstract as needed.
The workflow is straightforward: write a description, the AI generates variations, you refine the ones you like, adjust colors and composition, then prepare the file for printing. Vireous.Shop integrates this entire process into one platform, letting you generate custom designs and move directly to production without jumping between tools.
This approach's power lies in speed and iteration. Traditional design takes weeks. AI-generated designs let you explore dozens of directions in an afternoon, refining variations with different color schemes, artistic styles, or compositions until you find exactly what works.
Writing Effective Design Prompts
The quality of your AI-generated design depends entirely on how clearly you describe what you want. Vague prompts produce vague results; specific prompts produce specific results. Think of your prompt as a conversation with the AI, the more detail you provide, the closer the output matches your vision.
Start with the core subject. "A mountain landscape" is less useful than "A dramatic rocky mountain peak at sunrise with golden light hitting snow-covered peaks and a misty valley below." Include style preferences: photorealism, abstract expressionism, minimalist line art, watercolor, or something else. Color palette matters enormously, "warm oranges and deep reds with touches of gold" is more useful than "warm colors." Include composition hints: "subject in the left third of the frame with negative space on the right" produces different results than "centered subject."
Test multiple prompt versions. Small wording changes shift the entire output. If you get something close but not quite right, modify the prompt and regenerate. This iterative process is where AI design excels.
Refining Your AI-Generated Design
Once you have initial generations, refinement begins. Look at what the generator produced. What works? What doesn't? Maybe the composition is perfect but the color temperature is off. Most AI platforms, including Vireous.Shop's custom design tools, let you adjust the output through regeneration with modified prompts or editing controls for color, contrast, saturation, and composition.
Think about how the design will look at actual size on your wall. A detail that looks fine on a small preview might disappear when printed large. Ask yourself: will this design hold up at the size I'm printing it?
Pay attention to technical requirements. Your refined design needs to be saved in a format that works for printing, typically high-resolution PNG or TIFF files. The AI output should be at least 300 DPI (dots per inch) for quality printing.
Prepare High Resolution Art for Printing
You have a beautiful design, but when it arrives printed, it might look fuzzy or pixelated. The culprit is usually resolution. Digital art and print have different requirements, and crossing that bridge correctly matters.
Understanding DPI and Image Scaling
DPI stands for dots per inch and measures how many dots of ink the printer will place in each linear inch of your final print. For wall art, you need at least 300 DPI at your final print size (printing.org). This is the industry standard for quality photo and art prints.
Here's the math: if your AI-generated image is 3000 pixels wide and you want to print it at 10 inches wide, your DPI is 300 (3000 divided by 10). That's perfect. If you want to print the same 3000-pixel image at 20 inches wide, your DPI drops to 150, and you'll see pixelation.
The key insight: know your intended print size before finalizing your design, then ensure your source image has enough pixels. Scaling up a small image always loses quality. Scaling down a large image is fine, you're just discarding data you don't need.
Color Profiles and Print-Ready Files
Digital screens display color differently than printed paper. What looks vibrant on your monitor might print duller because screens use RGB color (red, green, blue light mixing), while printers use CMYK color (cyan, magenta, yellow, black inks mixing).
To bridge this gap, your design needs a color profile. For most wall art printing, use the sRGB color profile, the standard for screen-to-print conversion (iso.org). When you export your design for printing, save it as a TIFF or high-quality PNG file. JPEG compression can introduce artifacts visible at large sizes. Make sure your file includes bleed area, extra space beyond your final print dimensions that ensures colors extend all the way to the edge without white borders.
Check your file one more time before sending it to print. Open it in an image viewer and zoom in. Look for pixelation, compression artifacts, or color banding. If you see any of these, adjust before printing.
Wall Art Layout Ideas and Composition
Gallery walls and multi-piece layouts require planning. A poorly arranged gallery wall looks chaotic; a well-planned one creates visual balance and draws the eye exactly where you want it.
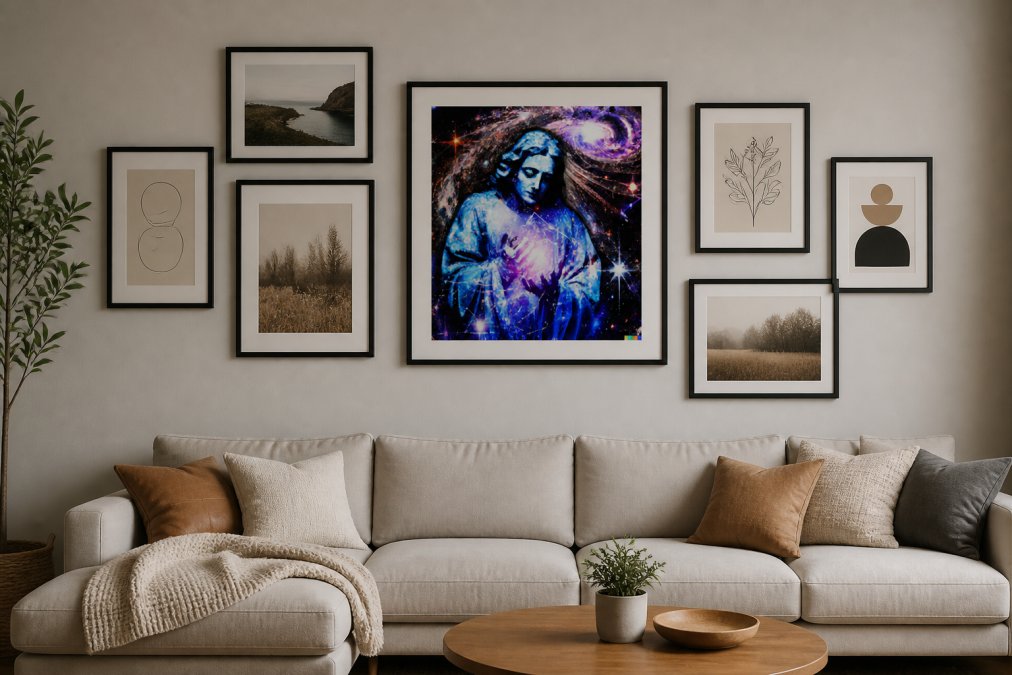
Gallery Wall Formulas and Visual Balance
The easiest gallery wall formula is the grid. Choose consistent spacing between frames, usually 2-3 inches, and arrange your art in even rows and columns. A 3x3 grid of 8x10 framed prints creates a 28x28 inch wall feature.
The salon style is looser, arranging frames at varying heights and spacing to create an organic, collected-over-time feel. The key is visual balance, heavier or darker pieces should be distributed across the wall, not clustered in one corner.
Consider the focal point. One piece should command attention, whether it's your largest frame, most vibrant color, or most striking image. Place it slightly off-center or at eye level, and arrange other pieces to support it. Color harmony matters too. If all pieces are cool blues and purples, they feel cohesive. Intentional color relationships create unity without requiring identical tones.
Measuring and Planning Your Layout
Before drilling a single hole, create a layout plan on paper. Measure your wall and mark any windows, doors, or architectural features. Decide on your grid or arrangement style, then measure your frames.
Use painter's tape to mark frame positions on your wall. Step back and look at the arrangement from across the room. Does it feel balanced? Is the focal point clear? Do spacing intervals feel consistent? Adjust the tape until satisfied, then mark your hanging points with a pencil. Use a level to ensure frames hang straight.
Select Materials, Frames, and Mounting Hardware
Your design is only half the equation. The physical materials and frame you choose dramatically affect how the final piece looks and feels.
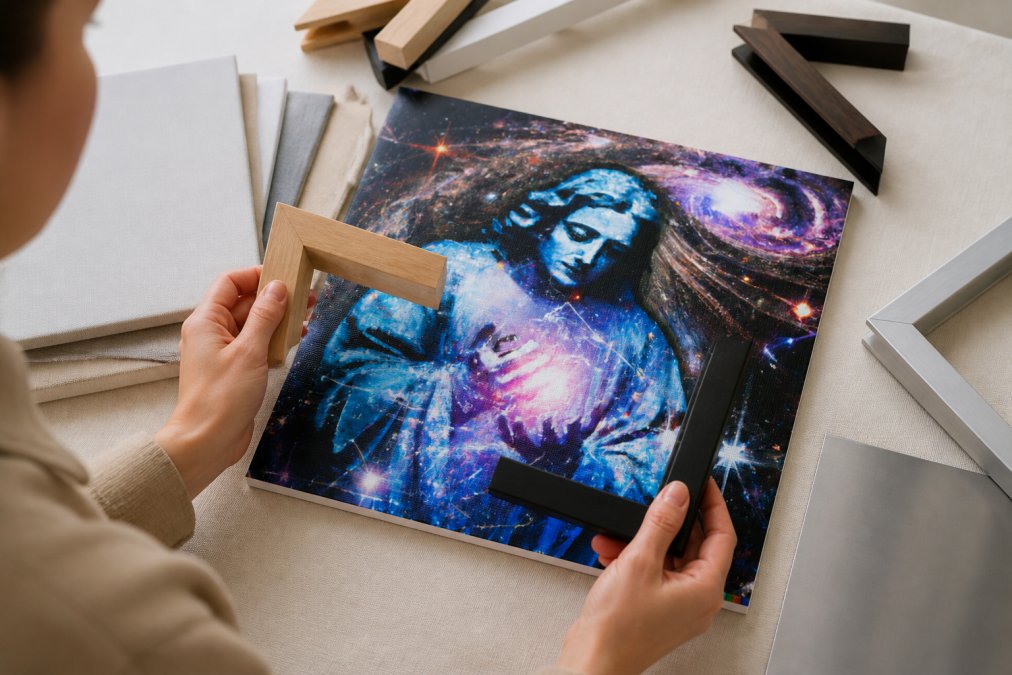
Canvas prints are popular for their texture and gallery-like feel. Metal prints offer a modern, sleek aesthetic and hold color exceptionally well. Paper prints mounted in frames give you flexibility to change the frame or mat later. Framed prints come ready to hang, appealing to those who want zero assembly.
Frame selection is personal, but a few principles help. Thin frames feel contemporary; thick frames feel traditional. Metal frames suit minimalist decor; wood frames warm up a space. The frame color should either match your dominant wall color or complement your art.
Mounting hardware matters more than people realize. Your wall material, drywall, plaster, concrete, or brick, determines what hardware works. Drywall needs anchors if you're not hitting studs (the CDC). Plaster is brittle and needs special anchors. Concrete requires masonry fasteners. For heavy pieces, use two hanging points and ensure they're level.
Customize Your Design and Finalize
Before committing to printing, customize and finalize your design. Most custom design platforms, including Vireous.Shop's tools, offer customization controls. You can adjust colors, add text, modify composition, or swap elements.
Think about text carefully. If adding words, choose a font that complements your design style. Keep text minimal and purposeful. Preview your design at the actual print size if possible. Will the details be visible? Will the colors feel right? Will it work with your furniture and decor?
Once satisfied, export your final file according to your print provider's specifications. Most require 300 DPI and specific file formats. Order a proof if unsure, a small sample printed on your chosen material prevents expensive mistakes.
Designing custom wall art is the intersection of creativity and technical precision. You need a clear vision, the ability to describe it so an AI can generate it, and the knowledge to prepare files for printing correctly. The process produces something no mass-market retailer can offer: art that's genuinely yours, tailored to your space, reflecting your taste and personality. Vireous.Shop's AI-powered design tools and high-quality printing eliminate friction from this process. Generate unlimited designs from natural language prompts, customize them with intuitive editing controls, and receive printed wall art quickly. Your custom artwork is ready to transform your space.
| Step | Purpose | Key Consideration |
|---|---|---|
| Understand your space | Define the visual context | Measure walls, note light, identify focal points |
| Write design prompts | Generate AI artwork | Be specific about style, mood, and composition |
| Refine generations | Iterate toward your vision | Test multiple prompt variations |
| Check resolution and DPI | Ensure print quality | Match file size to intended print dimensions |
| Plan your layout | Create visual balance | Use painter's tape before hanging |
| Select materials and frames | Choose aesthetic and durability | Match material to space style and wall type |
| Customize and finalize | Make last adjustments | Preview at actual size before printing |
Frequently Asked Questions
What resolution do I need for custom wall art prints?
For sharp, professional results, aim for 300 DPI (dots per inch) at your final print size. For example, an 11x14 inch print should be 3,300 x 4,200 pixels at 300 DPI. If you're using an AI wall art generator, it typically produces high-resolution files suitable for printing. Anything lower than 150 DPI may show pixelation, especially on larger prints. Check your print service's specific requirements before uploading.
How can I design custom wall art if I'm not artistically skilled?
An AI wall art generator removes the need for artistic ability. Simply describe what you want in natural language, colors, mood, style, subject matter, and the AI creates original designs. Refine the results by adjusting your prompts or using the customization tools available on platforms like Vireous.Shop. You control fonts, colors, text, and layout without needing design software or artistic training.
What's the best way to arrange wall art layout ideas in a gallery wall?
Start by measuring your wall space and laying out your frames on the floor first. A common formula is the 2/3 rule: arrange pieces so they occupy roughly two-thirds of your wall height, leaving balanced space at top and bottom. Maintain consistent spacing (typically 2-3 inches) between frames. Mix frame sizes and orientations for visual interest, but keep the overall composition balanced. Use painter's tape to mark positions before hanging.
Can I use my own images or AI-generated designs for custom wall art?
Yes. You can upload your own high-resolution images, use designs from an AI wall art generator, or combine both. If using AI-generated art, ensure you have rights to use it commercially or personally. Most AI tools, including those integrated with platforms like Vireous.Shop, grant you ownership of the generated designs. Always verify file resolution (300 DPI minimum) and color profile (RGB or CMYK) before sending to print.
This article was written using GrandRanker