

Table of Contents
- How to Generate Custom Wall Art from Text Prompts
- Best AI Prompts for Wall Art: Styles That Match Your Space
- How to Preview Art on Walls Before You Buy
- AI-Generated Canvas Printing Services: What to Look For
- Upscaling Workflows: From Screen to Print-Ready Files
- Legal and Copyright Considerations for AI Art
- Frequently Asked Questions
Last Updated: September 19, 2026
How to Generate Custom Wall Art from Text Prompts
Custom wall art is artwork designed for your specific space, created by you rather than picked off a shelf. AI image tools now let anyone turn a written idea into a finished design in minutes. At Vireous.Shop, we watch creators do this every day, and the pattern is clear: the people who get great results treat the prompt like a design brief, not a search box.
Here is the basic process for using AI to visualize custom wall art before you commit to a print:
- Pick your subject and mood in plain words
- Add a style, color palette, and lighting direction
- Set the aspect ratio to match your wall space
- Generate several versions and compare them
- Preview the best one on your actual wall
- Order the print in the right size and finish
The tools handle step one through four. Steps five and six are where most people rush, and that is exactly where a design falls apart.
Writing Prompts That Actually Work
A good prompt reads like a sentence you would say to an artist. "A quiet mountain lake at sunrise, soft mist, muted blues and grays, wide horizontal composition" beats "cool nature art" every time.
Specific prompts give you specific results. Vague prompts give you generic stock imagery you could find anywhere.
A common mistake is stacking twenty adjectives into one prompt. The AI averages them out and the image turns muddy. Stick to four or five clear elements:
- Subject: what is in the frame
- Style: abstract, minimalist, photographic
- Palette: the two or three dominant colors
- Light: soft, dramatic, backlit
- Shape: wide, tall, or square
Best AI Prompts for Wall Art: Styles That Match Your Space
The best AI prompts for wall art start with the room, not the artwork. A bold abstract piece energizes a plain hallway. A soft photographic print calms a busy living room. Match the style to the space and the print looks intentional.
Think about what the room already does. If your furniture is neutral, you have room for a loud piece. If the room is already busy, a minimalist print keeps things from feeling cluttered.
Abstract, Minimalist, and Photographic Styles
Each style solves a different design problem:
| Style | Best For | Prompt Cues |
|---|---|---|
| Abstract | Filling large blank walls | "bold shapes, layered color, no clear subject" |
| Minimalist | Small rooms, calm spaces | "one subject, lots of negative space, two colors" |
| Photographic | Realistic, personal scenes | "natural light, shallow depth of field, true-to-life" |
| Geometric | Modern, structured rooms | "clean lines, repeating shapes, flat color" |
Abstract work hides small print flaws well, which makes it forgiving for large canvas. Photographic work demands clean files and sharp detail. Choose the style with that trade-off in mind.
How to Preview Art on Walls Before You Buy
To preview art on your wall, upload the image to a mockup tool or an augmented reality app and view it in the room. This step catches scale problems before you spend money. A piece that looks perfect on a laptop can swallow a small wall.
Most design tools let you drop the file onto a photo of your room. Better apps use your phone camera to place the art in real time. Both work. The camera version wins because it accounts for your actual lighting and wall color.
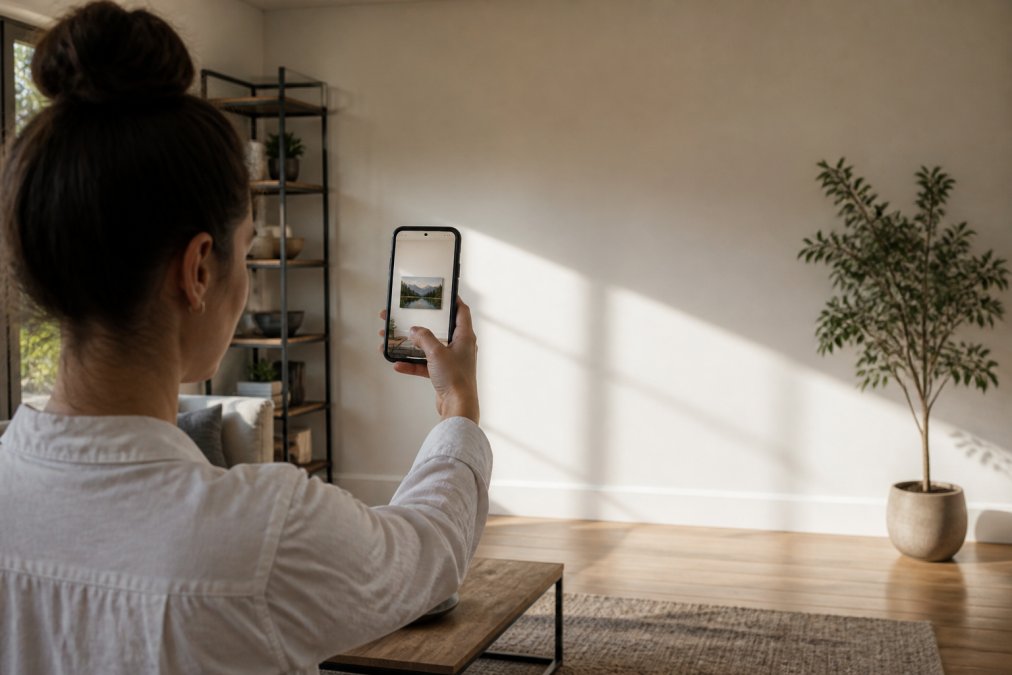
Measure the wall first, then tape the outline of your planned size in place. Live with it for a day. This low-tech check stops the most common regret in wall decor.
Using Mockups and Augmented Reality Tools
A mockup is a flat image of your art placed on a photo of a room. Augmented reality goes further and projects the piece onto your real wall through your camera.
Create Your Own AI-Generated Canvas Art →
Use mockups to test color and composition. Use AR to test size and placement. Together they answer the two questions that matter: does it fit, and does it look right there.
AI-Generated Canvas Printing Services: What to Look For
The best AI-generated canvas printing services combine a simple design upload with real print specs you can check. Look for a service that states its canvas weight, finish, and depth in plain numbers.

A print-ready file needs three things: enough resolution, a sensible aspect ratio, and a color profile the printer supports. Most consumer AI image tools output files at 1024x1024 pixels or similar. That is fine for a phone screen and far too small for a 24x36 inch canvas. The math is straightforward: multiply your target print size in inches by 150 for a good result, or 300 for gallery quality. A 24x36 inch print at 150 DPI needs 3,600 x 5,400 pixels. At 300 DPI it needs 7,200 x 10,800 pixels. If your file falls short, you either upscale it or order a smaller size.
Aspect ratio matters just as much.
Resolution, Color Gamut, and File Preparation
Resolution is the number of pixels in your file. More pixels means a sharper print at large sizes. As a rule, aim for a file that holds up at the size you ordered, not just the size on your screen.
| Canvas Size (inches) | Pixels Needed at 150 DPI | Pixels Needed at 300 DPI |
|---|---|---|
| 8 x 10 | 1,200 x 1,500 | 2,400 x 3,000 |
| 12 x 16 | 1,800 x 2,400 | 3,600 x 4,800 |
| 16 x 20 | 2,400 x 3,000 | 4,800 x 6,000 |
| 18 x 24 | 2,700 x 3,600 | 5,400 x 7,200 |
| 24 x 36 | 3,600 x 5,400 | 7,200 x 10,800 |
| 30 x 40 | 4,500 x 6,000 | 9,000 x 12,000 |
Upscaling Workflows: From Screen to Print-Ready Files
A practical upscaling workflow:
- Check the file's current pixel dimensions (right-click and view properties, or open it in any image editor)
- Decide your final print size in inches and multiply by 150 to get your target pixel count
- Run the file through an AI upscaler, choosing a model suited to your image type (photo, illustration, or artwork)
- Review the result at 100 percent zoom, checking edges, fine lines, and any text for artifacts
- If the upscale introduces noise or halos, try a different model or reduce the upscale factor and run it twice
- Export as PNG or TIFF at the highest quality setting
- Verify the final pixel dimensions match your target before uploading to the printer
For most wall art sizes, a final file of 3,600 x 5,400 pixels covers a 24x36 inch canvas at 150 DPI. That is a realistic target for a single AI upscaling pass from a standard 1024x1024 output. Larger sizes or higher DPI targets may need two passes or a higher starting resolution from your generator.
Legal and Copyright Considerations for AI Art
Copyright rules for AI-generated art are still shifting, and the safe path is simpler than the legal debate. In the United States, the U.S. Copyright Office guidance on AI-generated works states that works lacking human authorship cannot be registered. That means a pure AI output may not be yours to protect.
A few practical habits:
- Keep your prompts and edit history as a record of your process
- Avoid prompts that name a living artist or a protected character
- Do not upload photos you do not own as reference
- Check the terms of the AI tool you use
Frequently Asked Questions
What AI can I use to create custom wall art?
Tools like OpenAI's DALL-E 3 let you generate images from text prompts. You can then import those designs into a canvas printing service. Vireous.Shop integrates with DALL-E 3, so you can create artwork and order it printed on canvas in one place. The process is straightforward: write a prompt, generate the image, upload it to the product page, and select your size.
How do I visualize art on my wall before buying?
Use a mockup tool or augmented reality app to see how a canvas print will look in your room. Take a photo of your wall, then overlay the artwork to check scale and color. Many online design tools let you upload a room photo and adjust the art's size and placement. This helps you avoid returns and ensures the piece fits your interior design.
Can I turn my own photos into custom wall art using AI?
Yes. You can upload a personal photo to an AI image generator and apply artistic styles, or use a service that accepts your photo directly for canvas printing. Some platforms, like Vireous.Shop, allow you to import images from OpenAI or upload your own files. The result is a personalized canvas print that reflects your memories or brand.
What resolution do I need for a high-quality canvas print?
For a sharp canvas print, aim for at least 150 pixels per inch (PPI) at the final print size. A 16x20 inch canvas needs roughly 2400x3000 pixels. If your AI-generated image is smaller, use upscaling software to increase resolution without losing detail. Check that the file is in a lossless format like PNG or TIFF before sending it to print.