

Table of Contents
- What Are Lighting Modifiers in AI Art?
- Crafting AI Art Lighting Prompts That Work
- Understanding the AI Art Prompt Formula for Lighting
- Creating Soft Lighting Prompts for AI Art
- Best AI Image Generators for Lighting Control
- Step-by-Step: Applying Lighting Modifiers
- Troubleshooting Common AI Lighting Failures
- Maintaining Lighting Consistency Across Series
- Frequently Asked Questions
Last Updated: October 12, 2026
What Are Lighting Modifiers in AI Art?
Lighting modifiers are text descriptors you add to AI art prompts to control how light falls on your subject, shaping mood, depth, and visual impact, and learning how to use lighting modifiers in ai art is essential for creating professional results.
At Vireous.Shop, we help creators generate custom AI art for personalized apparel and wall art. Modifiers work by instructing the AI to simulate real photography lighting techniques, so you direct the light instead of hoping for it.
Lighting Modifiers vs. Light Sources
Light sources create the light (a window, lamp, sun); lighting modifiers describe its quality and behavior. A source tells the AI what emits light; a modifier tells it how that light looks and feels.
Light sources:
- Natural sunlight
- Candlelight
- Neon signs
Lighting modifiers:
- Soft, diffused light
- Hard, dramatic shadows
- Golden hour glow
You need both. A source alone ("lit by sunlight") lacks control; modifiers without a source ("soft, warm light") confuse the AI about origin.
Crafting AI Art Lighting Prompts That Work
The difference between a flat image and a striking one often comes down to prompt structure, which is why understanding how to use lighting modifiers in ai art matters so much. Your lighting description must be specific, layered, and ordered logically.
The Four-Part Prompt Structure
A lighting-focused prompt has four essential components. Stack them in this order for best results:
- Subject and context, what you're lighting
- Light source, where light originates
- Lighting modifiers, the quality and behavior of light
- Mood and atmosphere, the emotional tone
Example: "A woman in a red dress, lit by warm evening sunlight, soft and diffused through lace curtains, creating a romantic, intimate mood."
The AI processes prompts sequentially, so order matters. Leading with modifiers before establishing a source confuses the model. Start concrete, then layer in atmosphere.
Real Prompt Examples by Lighting Style
Backlit and glowing: "Figure standing in a field, backlit by golden sunset, rim lighting around edges, subject in silhouette, atmospheric and ethereal, lens flare present."
Each example specifies light direction, quality, and emotional intent. Vague prompts like "good lighting" get ignored; specific modifiers get results.
Understanding the AI Art Prompt Formula for Lighting
Your prompt is a formula. Every word influences the output. Understanding which components matter most helps you write tighter, more predictable prompts.
Component Breakdown and Order
Subject (15-25% of prompt): The thing being lit. Be specific about pose, expression, clothing, and context.
Light source (20-30% of prompt): Name the origin.
Modifiers (30-40% of prompt): This is where you control the look. Soft vs. hard.
Mood and atmosphere (15-20% of prompt): The emotional layer.
Why Word Order and Specificity Matter
The AI reads left to right, and early words carry more weight, so burying your lighting description mid-prompt reduces its influence. Compound descriptors also outperform single words: "soft, warm, diffused light" beats "soft light." Test it yourself with "good lighting" vs. "soft, golden, diffused light from the left, warm and gentle", the second wins every time.
Creating Soft Lighting Prompts for AI Art
Soft lighting is the most forgiving and flattering style. It minimizes flaws, creates mood, and works across genres, portraits, fashion, lifestyle, even product shots.
Soft Light Characteristics and When to Use Them
Soft light spreads evenly across your subject. Shadows are gentle. There's no harsh contrast. It feels intimate and approachable.
Use soft lighting for:
- Portraits and headshots
- Fashion and lifestyle photography
- Romantic or intimate scenes
Soft light is hard to mess up, which is why beginners default to it. The trade-off: it can feel flat without careful composition.
Modifier Keywords for Soft Light
Build your soft light prompt with these keywords:
- Diffused light
- Soft shadows
- Even lighting
Combine three to five of these in your modifier section. "Soft, diffused window light with warm golden tones and gentle shadows" is a solid soft light descriptor.
| Modifier | Effect | Best For |
|---|---|---|
| Diffused | Spreads light evenly | Portraits, beauty shots |
| Window light | Natural, directional softness | Lifestyle, intimate scenes |
| Golden hour | Warm, flattering glow | Fashion, outdoor scenes |
| Overcast | Even, shadowless | Product, neutral backgrounds |
| Bounce light | Reflected, gentle fill | Reducing harsh shadows |
Best AI Image Generators for Lighting Control
Not all AI image generators handle lighting modifiers equally. Some respond precisely; others ignore or misinterpret them.

Comparing Tools and Their Lighting Precision
The best tools are built on models trained on photographic data and responsive to detailed prompt language.
Vireous.Shop uses DALL-E 3 integration, which excels at translating lighting language into visual output and understands concepts like "rim lighting," "key light," and "diffused backlighting."
To choose a tool, test it with a specific lighting prompt.
Look for tools that:
- Accept detailed text prompts (not just keywords)
- Show consistent lighting behavior across multiple generations
- Preserve composition while changing lighting
Step-by-Step: Applying Lighting Modifiers
Follow this workflow to apply lighting modifiers effectively in your AI art generation.
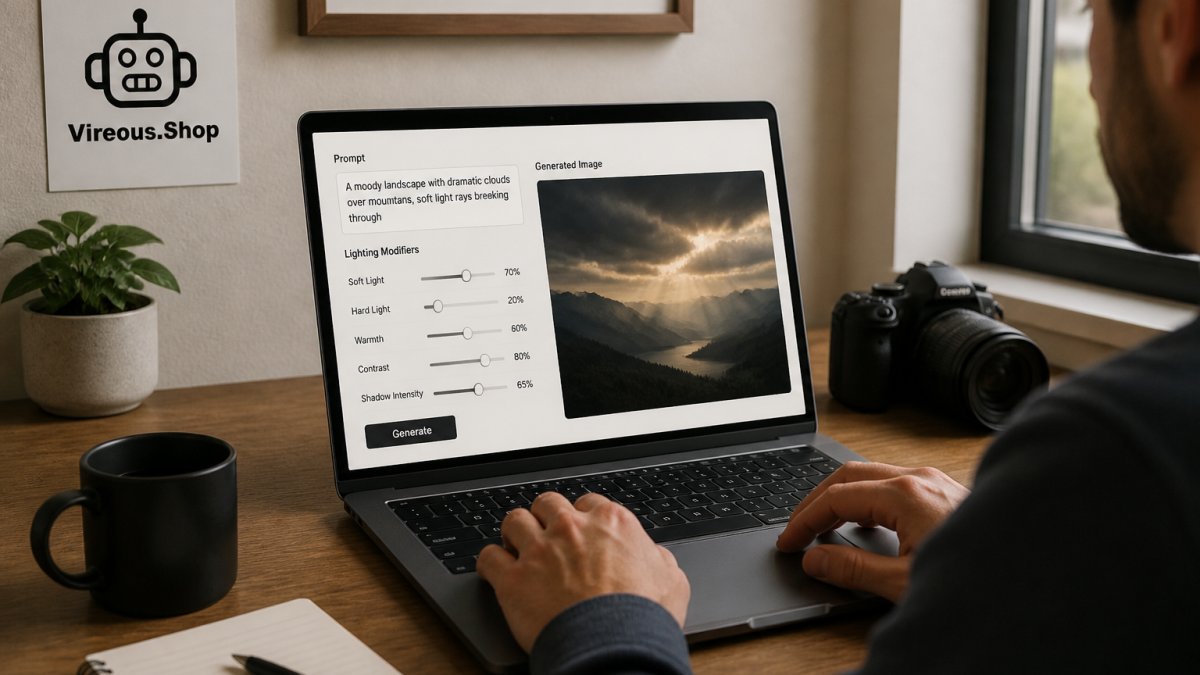
Step 1: Choose Your Light Source and Direction
Start by deciding where light comes from. This anchors your entire lighting setup.
Common light directions:
- From the left or right (creates dimension)
- From above (standard studio setup)
- From behind (backlighting, rim light)
Write this into your prompt explicitly: "lit by sunlight from the left," "backlit by golden sunset," "lit from above by studio strobes."
Omezdo™ Smart Wall Lamp Light Bar →
Direction changes everything. The same subject lit from different angles produces dramatically different moods.
Step 2: Select Your Lighting Pattern
Lighting patterns are named arrangements from professional photography. Using these names in your prompt gives the AI a clear reference.
Common patterns:
- Rembrandt lighting, key light at 45 degrees, creates triangle of light on cheek
- Butterfly lighting, light directly above, creates butterfly shadow under nose
- Split lighting, half the face lit, half in shadow, dramatic effect
Use these names directly: "Rembrandt lighting, dramatic and moody" or "butterfly lighting, soft and flattering." The AI recognizes these terms from photography training data.
Step 3: Specify Light Quality and Intensity
Now describe how the light behaves: harsh or soft, bright or dim, warm or cool.
Light quality descriptors:
- Hard light (sharp shadows, high contrast)
- Soft light (diffused, gentle shadows)
- Directional light (clear source, defined shadows)
Intensity descriptors:
- Bright and punchy
- Dimly lit
- Low-key lighting
Combine these: "soft, warm light with low intensity, creating intimate shadows" or "bright, hard light with high contrast, dramatic and moody."
Step 4: Add Mood and Atmosphere
Mood is the emotional tone your lighting creates, where your image goes from technically correct to compelling.
Mood descriptors that work with lighting:
- Romantic
- Moody
- Energetic
Example: "soft, diffused window light, warm golden tones, creating a romantic and intimate mood" tells the AI exactly what you want.
Step 5: Refine and Test
Generate your image and check whether the lighting matched your vision. Too harsh? Add "soft" and "diffused." Too flat? Add "directional" and more shadow description. Mood off? Adjust your emotion descriptors. Refining is iterative, most creators generate 3-5 variations before landing on the right lighting.
Troubleshooting Common AI Lighting Failures
Even with solid prompts, things go wrong: the AI misinterprets your intent, creates unnatural shadows, or loses your subject. Here's how to fix the most common issues.
Problem: Flat, Lifeless Lighting
What it looks like: Your subject is evenly lit from all angles with no depth, no shadows, no dimension. It looks boring and two-dimensional.
Why it happens: Your prompt lacks directional language. Words like "good lighting" or "well-lit" don't specify where light comes from.
Fix: Add directional modifiers and shadow description.
- Add: "lit from the left," "with shadows on the right," "directional key light"
- Specify: "shadows visible," "high contrast," "defined shadows"
- Example: "Portrait lit by directional sunlight from the left, with defined shadows on the right side, creating dimension and depth."
Problem: Inconsistent Shadows and Highlights
What it looks like: Shadows fall in multiple directions. Highlights appear randomly. The lighting doesn't follow physics. It looks broken.
Why it happens: Your prompt mixes conflicting light sources or uses vague directional language.
Fix: Commit to one primary light source and one direction.
- Remove: Multiple light sources in one prompt
- Specify: "single key light," "primary light from the left," "no fill light"
- Example: "Lit by a single key light from the left at 45 degrees, with minimal fill light, creating consistent shadow direction."
Problem: Unwanted Color Casts
What it looks like: Your image has a strange color tint, too blue, too yellow, too green. The skin tones look off.
Why it happens: Your light source descriptor creates a color temperature the AI interprets too literally.
Fix: Add color temperature modifiers to balance.
- Add: "neutral white balance," "daylight color temperature," "warm but natural"
- Specify: "no color cast," "accurate skin tones," "neutral lighting"
- Example: "Lit by warm window light with neutral white balance, natural skin tones, no color cast."
Problem: Subject Disappears or Blends Into Background
What it looks like: Your subject merges with the background. The lighting is so even or so directional that edges vanish.
Why it happens: No separation between subject and background. Rim lighting is missing.
Fix: Add rim light or backlight to separate subject from background.
- Add: "rim lighting," "backlit edge," "separation light," "edge lighting"
- Specify: "subject separated from background," "visible edge definition"
- Example: "Lit by key light from the left, with rim lighting on the back edge to separate subject from background."
Maintaining Lighting Consistency Across Series
Lock your lighting language. Write your core lighting descriptor once and reuse it for every image in the series.
Document your modifiers. Keep a text file of successful lighting prompts and reuse them for similar projects.
Test across variations. Generate the same subject with your locked lighting in different poses or angles to confirm predictable behavior, adjusting if needed.
Creating compelling AI art starts with mastering your lighting language, the difference between amateur and professional results often comes down to how precisely you describe light. Whether you're building a product line, creating branded merchandise, or designing one-of-a-kind gifts, consistent lighting control elevates every image. Customize your first AI-generated design with professional lighting modifiers and see how precision transforms your creative vision into tangible products.
Frequently Asked Questions
What are lighting modifiers in AI art prompts?
Lighting modifiers are descriptive words and phrases you add to AI art prompts to control how light falls on your subject. They include terms like 'soft diffused light,' 'rim lighting,' 'dramatic shadows,' or 'window light.' Modifiers differ from light sources (the origin of light) by specifying the quality, direction, and mood of that light. Instead of just saying 'sunlight,' a modifier lets you say 'warm, golden sunlight filtering through trees,' which gives the AI generator much more specific visual guidance.
How do you describe lighting in an AI art prompt using the right formula?
The most effective AI art prompt formula for lighting follows this order: subject + action, then light source, then light quality (soft/hard/diffused), then direction, then mood. For example: 'Portrait of a woman smiling, lit by golden hour sunlight, soft and diffused, coming from the left, creating a warm, dreamy mood.' This structure helps AI generators understand what you want by layering information from general to specific, making your results more predictable and professional.
What's the best way to create soft lighting prompts for AI art?
Soft lighting prompts for AI art work best when you combine modifier keywords like 'diffused,' 'gentle,' 'flattering,' and 'even.' Add context about the light source: 'soft window light,' 'overcast daylight,' or 'studio fill light.' Then specify the effect you want: 'minimal shadows, smooth skin tones, flattering highlights.' Example: 'Portrait, soft window light from the left, gentle and diffused, flattering highlights, warm color temperature.' Avoid harsh words like 'sharp,' 'dramatic,' or 'contrasty' when building soft-light prompts.
Can I combine multiple lighting modifiers in one AI art prompt?
Yes, you can combine modifiers, but order and clarity matter. Start with your main light source and quality, then add secondary elements. For example: 'Portrait lit by warm studio key light with soft fill light from the right, subtle rim lighting from behind, cool color temperature in shadows, dramatic but flattering mood.' Limit yourself to 3-4 main modifiers per prompt to avoid overwhelming the AI generator. Test combinations and refine based on results.