

Table of Contents
- Why Hanging Framed Art Without Nails Matters
- Best Adhesive Strips for Heavy Frames
- How to Use Command Strips for Gallery Walls
- Hanging Art on Textured Walls Without Nails
- Picture Hanging Systems: Rails and Cables
- Removing Adhesive Strips and Cleanup
- Frequently Asked Questions
Last Updated: September 27, 2026
Why Hanging Framed Art Without Nails Matters
Learning how to hang personalized framed art without nails is essential for renters, homeowners protecting their walls, and anyone who wants flexibility. Damage-free mounting solutions let you display your custom wall art confidently without leaving permanent holes.

Modern adhesive strips and picture hanging systems show you how to hang personalized framed art without nails, making damage-free installation straightforward and requiring no special tools.
Best Adhesive Strips for Heavy Frames
Adhesive strips designed for heavy frames offer the simplest damage-free solution, using strong removable adhesive that bonds securely without nails or hardware.
The strongest adhesive strips support frames up to 16 pounds, covering most personalized framed art prints, and leave no residue when removed properly.
Key factors when choosing adhesive strips:
- Weight capacity: Match the strip rating to your frame weight. A 10-pound frame needs strips rated for at least 10 pounds.
- Surface compatibility: Adhesive strips work best on clean, dry, smooth surfaces. Textured walls require special preparation.
- Removal ease: Quality strips peel away cleanly without damaging paint or leaving sticky residue.
- Repositioning: Some strips allow adjustment before final placement. Others set permanently once pressed.
Comparing Adhesive Backing Options
Adhesive strips come in different formulations. Each has distinct advantages depending on your wall type and frame weight.
Standard foam strips work well for lightweight frames under 5 pounds but may not hold heavier personalized framed art reliably.
Heavy-duty adhesive strips support frames up to 16 pounds and set over 24 hours for extremely strong holding power.
Velcro-style adhesive strips allow repositioning after installation, ideal for gallery walls, with weight capacity around 10 pounds.
Adhesive strip comparison:
| Strip Type | Weight Capacity | Best For | Repositionable |
|---|---|---|---|
| Standard foam | Up to 5 lbs | Light frames | Yes |
| Heavy-duty adhesive | Up to 16 lbs | Most framed art | No |
| Velcro adhesive | Up to 10 lbs | Gallery walls | Yes |
| Picture hanging tape | Up to 12 lbs | Textured walls | No |
Weight Capacity and Frame Selection
Understanding weight capacity prevents frames from falling. Frame weight includes the print, glass or acrylic perspex, and frame material.
Wooden frames typically weigh 2-4 pounds for small prints, while acrylic perspex fronting adds minimal weight while protecting your design.
Always use adhesive strips rated for at least 1.5 times your frame's actual weight. A 10-pound frame needs strips rated for 15 pounds minimum. This safety margin accounts for wall imperfections and ensures long-term holding power.
How to Use Command Strips for Gallery Walls
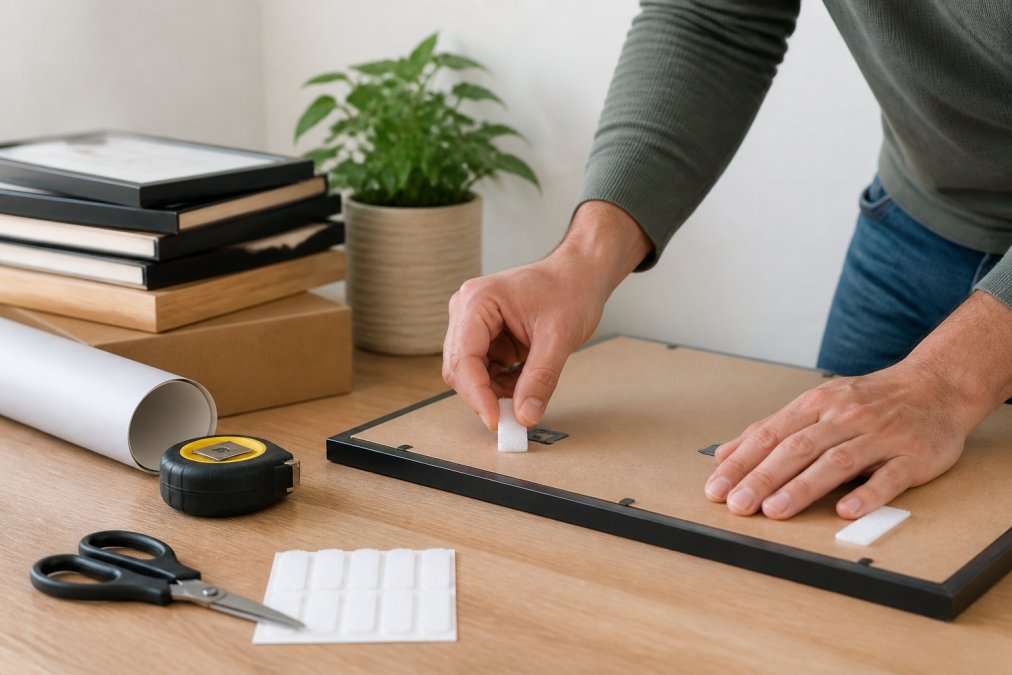
Command strips simplify installation for gallery walls. These adhesive-backed strips hold multiple frames securely without nails. The process is straightforward once you plan your layout.
Step 1: Plan your gallery wall layout
Sketch your design on paper, measure wall space, and mark frame positions with pencil. Use a laser level to ensure horizontal alignment.
Step 2: Prepare the wall surface
Clean the wall with a dry cloth. If your wall is textured or glossy, lightly sand the area where strips will attach.
Step 3: Apply adhesive strips to frames
Attach adhesive strips to the back of each frame and press firmly for 30 seconds. Most strips require 24 hours to reach full holding strength.
Step 4: Mount frames on the wall
Position each frame following your layout sketch and press firmly for 30 seconds. Start with corner or center frames, then fill in surrounding pieces.
Layout Planning and Spacing
Consistent gaps between frames create cohesion. Most designers use 2-3 inches between frames.
Installation and Leveling
A laser level ensures perfect horizontal alignment, eliminating guesswork and preventing visible tilts across multiple frames.
Hanging Art on Textured Walls Without Nails
Wall texture dramatically affects adhesive strip performance. Uneven textures create air pockets that weaken the bond, so understanding your wall material is essential.
Adhesive Compatibility by Wall Type
Smooth drywall (painted) is ideal for adhesive strips. Clean with a dry cloth and ensure the surface is free of loose paint. Weight capacity remains at rated limits (5-16 pounds).
You Wot! Renaissance Framed Art Poster →
Surface Preparation Checklist
Regardless of wall type, follow this preparation sequence:
-
Inspect the wall surface. Repair peeling paint, cracks, or damage with spackling compound or appropriate patching material. Sand smooth and repaint. Adhesive strips cannot hold on compromised surfaces.
-
Remove dust and debris. Use a dry cloth, soft brush, or vacuum with brush attachment. Dust blocks adhesive contact.
-
Test adhesion on a hidden area. Apply your chosen adhesive strip to an inconspicuous location and wait 24 hours. Peel at a 45-degree angle. If the strip removes cleanly and the wall is undamaged, proceed. If paint lifts or the strip fails, choose a different method.
-
Clean with appropriate solvents if needed. Use a damp cloth for dusty walls or rubbing alcohol for glossy surfaces. Let the wall dry completely (at least 30 minutes) before applying strips.
When to Switch Methods by Wall Type
If adhesive strips are unreliable, picture hanging rails, cable systems, or damage-free hooks offer alternatives. Ceiling-mounted cable systems work on any wall type and avoid adhesive altogether.
Picture Hanging Systems: Rails and Cables
Picture hanging systems offer an alternative to adhesive strips. Ceiling-mounted track systems hold frames via cables or cords and work well for rental properties.
Removing Adhesive Strips and Cleanup
Improper removal damages walls and leaves sticky residue. Plan removal as carefully as installation, considering adhesive type and wall condition.
Safe Removal Technique
Never yank frames away from the wall, as this causes paint damage and drywall gouging. Instead:
-
Loosen the adhesive bond. Apply gentle heat using a hair dryer on low setting, 6-8 inches from the wall, for 30-60 seconds. Heat softens the adhesive, making it more pliable.
-
Peel at a shallow angle. Start at one corner using your fingernail or plastic scraper (not metal). Peel at a 45-degree angle or shallower, working slowly around the perimeter while supporting the frame.
-
Remove the frame completely. Once free, set it aside rather than leaving it hanging.
-
Address remaining adhesive on the wall. See the residue cleanup section below.
Residue Cleanup by Adhesive Type
Command strips and premium adhesive products are engineered for clean removal. Most residue peels away by hand once the frame is removed. Roll the residue between your fingers into a ball and discard. This takes 30 seconds per frame location. No additional cleanup is needed for most walls.
Removing Stubborn Residue Without Damaging Paint
If hand-rolling does not remove all residue:
-
Test your cleaning method first. Apply your chosen solvent to a hidden wall area (inside a closet or behind furniture). Wait 5 minutes. Wipe with a soft cloth. Inspect for paint damage or discoloration. If the test area is undamaged, proceed.
-
Use rubbing alcohol for most paint types. Dampen a soft cloth with 70% isopropyl rubbing alcohol (not acetone or harsh solvents). Rub the residue gently in circular motions. The adhesive will soften and roll away. This works on latex and acrylic paint finishes.
-
Use a heat gun for stubborn adhesive. Apply heat for 15-20 seconds, then immediately peel or roll the softened residue. Repeat as needed. Heat makes adhesive more pliable without damaging paint.
-
Avoid aggressive scraping. Metal scrapers, abrasive pads, and harsh chemicals (acetone, paint thinner) can strip paint or damage drywall. Plastic scrapers and soft cloths are safer.
-
For textured walls, use a soft brush. Textured surfaces are more fragile. A soft-bristled brush removes residue without gouging texture. Brush gently in one direction rather than scrubbing.
Wall Inspection After Removal
Once residue is cleaned, inspect the wall:
- Check for paint damage. Small marks or slight discoloration usually fade or can be touched up with matching paint. If large areas of paint are missing, sand the edges smooth and repaint.
- Look for drywall gouges. Minor surface scratches do not require repair. Deeper gouges (more than 1/16 inch) should be filled with spackling compound, sanded smooth, and repainted.
- Verify adhesive is completely gone. Run your hand across the wall. It should feel smooth with no sticky spots. If residue remains, repeat the appropriate cleanup method.
Proper removal and cleanup preserve your wall condition and make future frame hanging easier. The time invested in careful removal prevents costly wall repairs.
Frequently Asked Questions
Can I hang framed art without nails on drywall?
Yes. Adhesive strips and mounting tape are specifically designed for drywall and are the most straightforward solution. Clean the wall surface thoroughly, apply the adhesive backing to your frame's mounting hardware or the frame itself, and press firmly for 30 seconds. Most adhesive strips hold frames up to 16 pounds on standard drywall, making them ideal for personalized framed art from Vireous.Shop.
What is the 2/3 rule for hanging pictures?
The 2/3 rule states that the center of your framed art should sit approximately two-thirds of the way up the wall, measured from floor to ceiling. This creates visual balance in most room layouts. For gallery walls, measure from the center point of your entire composition rather than individual frames to maintain proper vertical alignment and achieve a cohesive display.
How do adhesive strips hold heavy frames without damaging walls?
Adhesive strips use a special acrylic compound that bonds to the wall surface without puncturing it. When removed, they peel away cleanly without leaving residue or marks. The key is matching the strip's weight capacity to your frame size, a 16-pound strip works well for standard personalized framed prints, while heavier artwork requires multiple strips distributed across the mounting area.
Are adhesive strips safe for rental properties?
Adhesive strips are considered rental-friendly because they leave no holes when removed properly. However, always check your lease agreement and test on a small, inconspicuous area first. Some textured or freshly painted walls may be sensitive to adhesive backing. Remove strips slowly and at a 45-degree angle to minimize any surface impact.