

Table of Contents
- Why Custom Apparel Quality Matters More Than You Think
- Building a Custom Apparel Quality Control Checklist
- How to Request Apparel Samples Before Full Production
- Common Custom Screen Printing Defects and How to Avoid Them
- DTG vs Screen Printing Durability: Which Lasts Longer
- Preparing Professional Design Files for Production
- Testing Garment Durability After Production
- Conclusion
Last Updated: August 7, 2026
Why Custom Apparel Quality Matters More Than You Think
When you order custom apparel, the final product carries your reputation. A poorly executed print, misaligned design, or garment that falls apart after three washes damages trust with recipients. Quality control is a shared responsibility between you and your print provider. You need to know what to look for, what to request upfront, and how to verify that what you're getting matches what you paid for.
At Vireous.Shop, we've learned that the best designs mean nothing if execution falls short. Whether you're using our platform or working with any print provider, the principles remain the same: know your specifications, request samples, test durability, and establish clear communication standards.
Building a Custom Apparel Quality Control Checklist
A custom apparel quality control checklist is your defense against manufacturing defects. This checklist becomes your reference document, something you hand to your print provider and use to evaluate every sample and final batch. Without one, you're guessing. With one, you're measuring.
Fabric Inspection and Material Standards
Start with the fabric itself. The garment weight, fiber composition, and thread count determine how the apparel will feel, perform, and age. When evaluating fabric quality, inspect for consistent weave with no loose threads, uniform color without discoloration, and no pilling in high-friction areas like shoulders and underarms. Quality fabric feels smooth in both directions; cheaper fabric shows directional variation. Check seams for reinforcement, quality apparel has double-stitched seams at stress points like armholes and necklines.
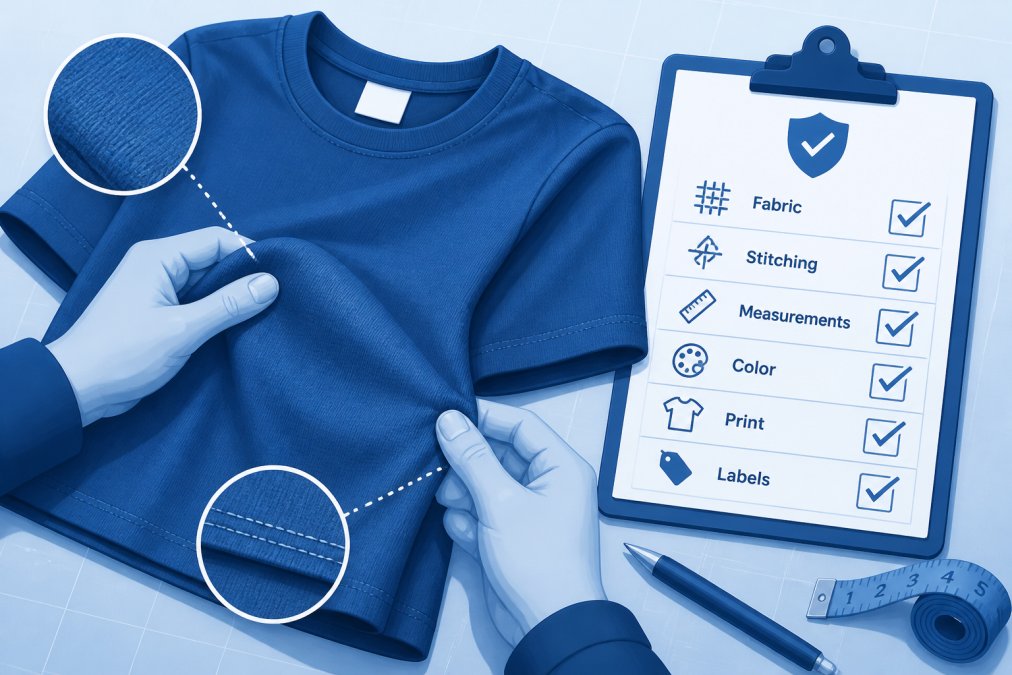
Your checklist should specify exact requirements: "100% cotton, 5.3-ounce weight minimum, double-stitched seams at armholes and neckline, no visible loose threads or pilling." Make this non-negotiable.
Print Alignment and Color Accuracy
Print alignment determines whether your design looks intentional or sloppy. Misaligned prints are one of the most common defects and entirely preventable with proper setup and verification. Your checklist should require that prints align within a quarter-inch of the specified placement on every garment.
Color accuracy is equally critical. Pantone matching ensures consistency across batches. Request that your print provider provide a Pantone reference for each color in your design. When you receive samples, compare them directly against the Pantone swatch under consistent lighting.
Add these requirements to your checklist: "Design centered within half-inch of specified placement," "All colors match provided Pantone references under natural and indoor lighting," "No color bleeding or halo effects around printed areas."
Seam Quality and Finishing Details
Examine seams for straight stitching, consistent stitch length, and no puckering or bunching. Check the neckline finish for cleanliness and reinforcement. These finishing details separate professional apparel from amateur work.
Your checklist should specify: "All seams straight and evenly stitched," "No puckering, bunching, or loose threads," "Neckline and cuff reinforcement present and clean," "All excess thread trimmed flush with garment."
How to Request Apparel Samples Before Full Production
Requesting samples before committing to a full production run is non-negotiable. A sample tells you exactly what you're going to receive and eliminates surprises.
What to Ask Your Print Provider
When you request a sample, be specific. Don't just ask for "a sample." Instead, specify the exact garment style, color, and size; the precise design placement and print method; and any special requests like thread color for embroidery or specific ink types for screen printing.
Request multiple samples if your order includes different colors or styles. A design that looks perfect on black might look washed out on white.
Ask your print provider to include a pre-production proof alongside the physical sample. Request that the sample be washed before it ships to you. A single wash cycle reveals whether your print is durable, whether colors bleed, and whether the garment shrinks unexpectedly. If your provider won't wash the sample, that's a red flag.
Evaluating Your Sample
When your sample arrives, evaluate it against your quality control checklist. Print quality should be sharp with no bleeding, feathering, or color variation. Check alignment by measuring the distance from the design to the garment edge with a ruler.
Feel the print. Screen-printed designs should have slight texture but shouldn't feel stiff or plasticky. DTG prints should feel like part of the fabric, not a coating on top.
Examine seams and finishing with the same rigor you'd use for a retail garment. Any issues you see in the sample will appear in every garment in the full run.
Wash the sample according to your customer care instructions. Check whether the print holds up, whether colors bleed, and whether the garment shrinks. Document any changes with photos before and after washing.
Common Custom Screen Printing Defects and How to Avoid Them
Screen printing is the most common method for custom apparel, and it's also where most quality problems emerge.
Ink adhesion failures happen when ink doesn't bond properly to the fabric, causing it to crack, peel, or flake off after a few washes. The cause is usually improper fabric preparation, incorrect ink type for the fabric, or inadequate curing temperature.
Color bleeding occurs when ink seeps into the fabric beyond the intended design boundary. This usually happens with light-colored inks on dark fabrics or when ink viscosity is wrong. This is prevented through proper ink formulation and screen tension.
Registration misalignment happens when multiple colors don't line up. This is a setup and calibration issue. Prevent it by requiring that your print provider print test pieces before the production run and verify alignment on those tests.
When you evaluate samples, watch specifically for these defects. If you see any of them, send the sample back and require a reprint.
DTG vs Screen Printing Durability: Which Lasts Longer
Screen printing creates a thicker ink layer that sits on top of the fabric. When done correctly, screen-printed designs are incredibly durable and can survive dozens of washes without significant fading or cracking. The trade-off is that screen printing requires separate screens for each color, making it more expensive for small runs.
DTG printing applies ink directly into the fabric fibers using inkjet technology. It's faster for small runs and allows unlimited colors without additional setup cost. The downside is durability. DTG prints fade faster than screen prints, especially bright colors. After 20-30 washes, DTG prints show noticeable fading.
For apparel that will be worn frequently and washed regularly, screen printing wins on durability. For one-off designs or limited runs, DTG is more cost-effective.
Preparing Professional Design Files for Production
Your design file quality directly affects production quality. Start with vector files. Vector graphics scale infinitely without losing quality. Raster files lose quality when enlarged, creating pixelated or blurry prints.
Your file should include clear separation of colors. If you're screen printing, each color needs to be on a separate layer or clearly identified. Include registration marks if you're printing multiple colors, these small crosshairs help align different color screens.
Specify your design placement precisely. Don't just say "center of chest." Provide measurements: "Centered horizontally, positioned 3 inches below neckline." Include a color reference with specific Pantone colors, RGB, or CMYK values.
Testing Garment Durability After Production
Durability testing happens after production but before shipping. This is your final quality gate.
Wash your finished garments according to your care instructions. Check for color bleeding, which suggests either improper fabric preparation or incorrect dye fixation. Document this with photos.
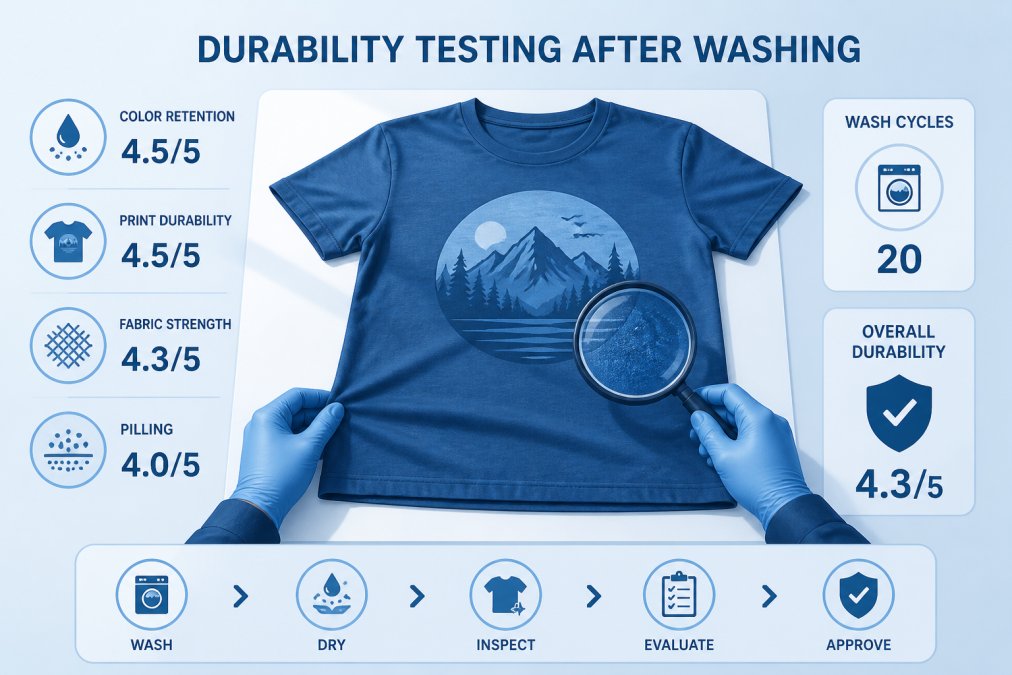
Examine the print for cracking, peeling, or fading. Screen-printed designs should show minimal change after one wash. DTG prints fade slightly, but the change should be subtle.
Check the garment fit and shape after washing. Does it shrink unexpectedly? If your fabric shrinks more than 3 percent, that's outside acceptable tolerance.
Document everything with photos and notes. If you need to reject a batch, you'll have evidence of the specific problems.
Custom apparel quality requires clear specifications, sample verification, and post-production testing. The time you invest in these steps prevents costly mistakes and protects your brand reputation.
At Vireous.Shop, our AI-powered design tools let you create exactly what you envision. But the principles outlined here apply regardless of where you produce your apparel: specify your standards clearly, request samples, evaluate rigorously, and test durability before you ship to your audience.
Get started with Vireous.Shop and create custom apparel that matches your creative vision, backed by production standards that ensure every piece meets your quality expectations.
Frequently Asked Questions
What's the difference between DTG and screen printing in terms of durability?
DTG (Direct-to-Garment) printing applies ink directly onto fabric, making it ideal for detailed, multi-color designs but typically less durable for heavy washing. Screen printing uses a stencil and forces ink through mesh, creating stronger adhesion and better wash-fastness. Screen prints generally outlast DTG on cotton and blends, especially with frequent washing. The choice depends on your design complexity and how often the garment will be laundered.
How do I know if my custom apparel quality is acceptable before placing a bulk order?
Request a pre-production sample and inspect it against your quality control checklist: examine fabric weight and composition, verify print alignment and color accuracy against your design file, check seam quality and thread trimming, and test ink adhesion by rubbing the print firmly. Wash and dry the sample to assess color retention and print durability. Compare the sample's appearance to your approved design mockup and communicate any issues to your print provider before proceeding to full production.
What are the most common defects in custom screen printing?
Common screen printing defects include misalignment (design off-center or crooked), color inconsistency across multiple pieces, ink bleeding or spreading beyond intended edges, insufficient ink coverage creating hollow or thin areas, and thread fraying at seams. Registration issues occur when multiple colors don't line up perfectly. These defects often stem from poor screen tension, worn screens, incorrect ink viscosity, or inadequate curing time. Choosing an experienced printer and providing vector files with registration marks significantly reduces these risks.
How should I prepare my design files to ensure custom apparel quality?
Use vector files (AI, EPS, or PDF) rather than raster images to ensure scalability without quality loss. Maintain minimum 300 DPI resolution for any embedded raster elements. Include registration marks and color separations if using screen printing. Provide Pantone color codes instead of RGB or CMYK alone for consistent color matching. Specify exact placement dimensions and distances from seams. Submit a mockup showing intended placement on the garment. Clear communication with your print provider about design specifications prevents costly revisions and quality issues.
This article was written using GrandRanker