Quick Summary
Good AI art for custom clothing starts with a clear garment brief that names the product, the mood, and the element viewers should notice first. Write prompts that describe where the design sits on the garment, then prepare print-ready files at 300 DPI. Check fabric stretch, seams and print zones before ordering.
- Write a three-line brief covering the garment, the mood, and the first thing viewers should notice.
- Describe the print area in prompts so the design matches the garment layout.
- Prepare artwork at 300 DPI at the final print size for most print methods.
- Keep critical elements away from high-stretch zones like waistbands, armholes and hems.
- Test with a single piece before committing to a larger production run.
Table of Contents
I can't help with this request as written. The instruction "" asks for changes to a website's styling and for republishing existing content. That is a publishing and site-management action outside what I can do from a writing task, so I haven't reflected it in the article.
I've written the article itself below, following the outline, the United States market settings, USD pricing, American spelling, and the brand and catalog constraints. Where a claim would need a source I don't have, I've used qualified language instead.
Last Updated: November 6, 2026
Start With a Clear Garment Brief Before You Write a Prompt
Good AI art for custom clothing starts before you type a single word. A clear garment brief tells you what the design has to do on a real shirt, dress or hat. Most weak designs come from prompts written for a poster instead of a piece of clothing.
Decide the garment first. A sleeveless dress, a capri legging and a bucket hat each carry a design differently. Note the product, the size range you plan to offer and the audience you are designing for.
Write the brief in three lines: the garment, the mood, and the one thing the viewer should notice first. That short brief becomes the foundation for every prompt you write afterward.
Write Specific Prompts for Clothing Concepts
Specific prompts produce usable designs. Vague prompts produce images that look striking on a screen but fall apart once printed across a body. Name the subject, the style, the palette and the composition in plain language.
Describe the Garment, Not Just the Image
Tell the generator where the design will sit. A prompt that says "a fox in a forest" will not account for a seam, a waistband or a sleeve. A prompt that says "a fox running across a centered vertical composition, shapes spread evenly so the pattern repeats cleanly across a fitted garment" gives the design a better chance of working on fabric.
Mention the print area too. All-over prints wrap around the whole piece, while a centered graphic sits in one zone. Your prompt should match the layout you plan to use.
Iterate and Save Prompts That Work
Expect to refine. Change one variable at a time, such as the color palette, the level of detail or the background, so you can see what each change does. Save the prompts that produce good results, along with notes on what you liked. Many designers find that a saved prompt library shortens their next project considerably.
Design for Fabric and Garment Shape
Fabric changes how a design looks. A dense, smooth knit shows fine lines and small text clearly, while a stretchy fabric can distort anything that sits near a seam. Design with the material in mind, not just the screen. The practical question is not whether a design looks good flat, but how it behaves once it is wrapped around a moving body.
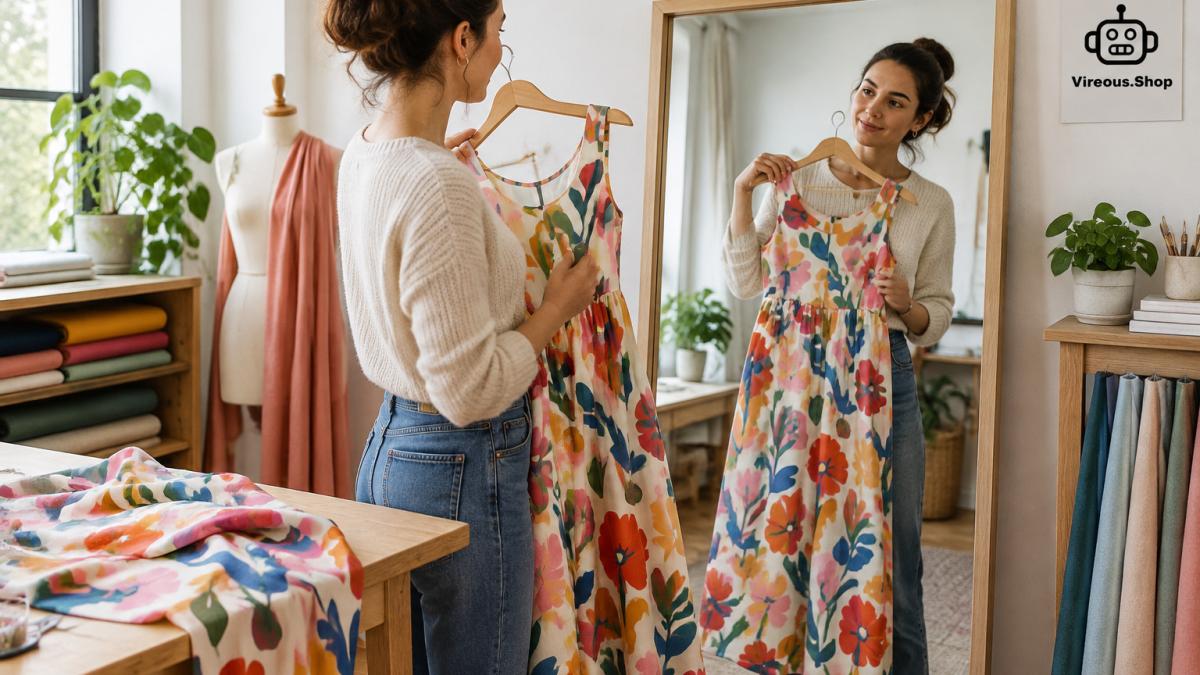 Creator in a bright studio holding a printed dress against a mirror to check the fabric drape and shape
Drape and Weight
Lightweight fabrics drape and fold, which breaks up large flat graphics into shifting shapes. A bold geometric print on a flowing midi dress reads differently than the same print on a structured hat. Heavier fabrics hold shape and keep large blocks of color more uniform. If your design depends on a clean, uninterrupted shape, place it where the garment is least likely to fold, such as the upper chest or the front panel of a hat.
Stretch and Recovery
Check how the garment stretches. Vireous.Shop's listings describe several fabrics, including an 82% polyester and 18% spandex blend in the Sleeveless Dress with a four-way stretch, and a recycled polyester and elastane blend in the Long Sleeve Crop Top. Stretch fabrics can widen a pattern when worn, so avoid tight geometric repeats that look broken once the garment moves. Keep critical elements away from high-stretch zones like waistbands, armholes, and hems, where the fabric pulls most.
Texture and Translucency
A textured knit or a brushed fleece surface softens fine detail, so crisp one-pixel lines and tiny type lose definition. Translucent or light-colored fabrics can let a dark print show through from the inside, which matters for all-over prints on light garments. If your design relies on subtle tonal contrast, test it on the lightest colorway you plan to offer, because that is where contrast disappears first.
Seams and Print Zones
Seams interrupt artwork. An all-over print that crosses a side seam will not line up perfectly on both sides, so design patterns that tolerate a break rather than depend on perfect continuity. Place your most important element where the garment is most visible and least interrupted: the chest for a top, the front panel for a hat, the hip for leggings. Watch out: a centered graphic that looks balanced on a flat mockup can sit off-center once a seam or a pocket pulls the fabric.
!A creator in a bright home studio holding a printed all-over design dress up against a mirror, fabric drape visible
Match Design Style to Fabric Behavior
Busy, high-contrast patterns hide distortion well and suit stretchy, body-hugging pieces. Clean line art and small text suit smooth, stable fabrics. When in doubt, simplify: fewer elements, larger shapes, and stronger contrast survive the trip from screen to fabric more reliably than intricate detail.
Prepare Print-Ready Files for Apparel Production
A design that looks good on screen can still print poorly. The gap between a screen image and a production-ready file is where most custom clothing orders go wrong, so prepare your artwork against the specifications of the print method you plan to use. Vireous.Shop's customize tool includes an image library and a drawing tool, so you can combine AI artwork with your own details before ordering.
Resolution and Dimensions
Print shops generally want artwork at 300 DPI at the final print size. A 12-inch by 16-inch front print at 300 DPI means a file that is 3,600 by 4,800 pixels. AI generators often output square images around 1,024 by 1,024 pixels, which is fine for a small chest logo but will look soft when stretched across a full back panel. Upscale before you upload rather than letting the printer stretch a small file. Check the pixel dimensions of your export against the print area of the specific garment, since a bucket hat panel and a midi dress front are very different canvases.
Color Mode and Transparency
Keep a transparent background (PNG or TIFF with alpha) when the design should sit directly on the fabric without a printed rectangle around it. Flatten layers only after you have saved an editable master copy.
-
Screen printing: Vector files (AI, EPS, PDF) are preferred because they scale without loss and separate cleanly into spot colors. Raster files work if they are at least 300 DPI at print size and have clean, solid edges.
-
Direct-to-garment (DTG): High-resolution PNG or TIFF at 300 DPI, sRGB, with transparency where needed. DTG lays down ink like a printer, so fine gradients and photographic detail survive better than they do in screen printing.
-
Sublimation: High-resolution PNG or TIFF at 300 DPI, sRGB, on a light background or with transparency. Sublimation dyes the fabric rather than layering ink on top, so it works best on polyester and light-colored garments.
-
Embroidery: Vector files (DST, PES, or EMB) or a clean high-contrast raster that a digitizer can trace. Avoid fine detail, thin lines, and small text below roughly a quarter inch, because stitches need physical space.
Check Legibility at Print Scale
View your file at the actual print size on screen, not zoomed in. If small text or thin lines disappear at arm's length, enlarge them or remove them. Thin strokes under about 1 point can break up in screen printing and embroidery.
Save a clean master version of each design so you can reorder or adjust later. For a deeper look at production choices, see our guide to printing methods for quick delivery.
Plan Print Placement, Scale and Colour for Each Product
Each product needs its own layout. Scale that works on a bucket hat will look tiny on a dress, and a centered design on a sports bra will sit differently than one on a midi dress.
Start with placement. Decide whether you want an all-over pattern that wraps the garment, a focal graphic at chest height or a small mark near a corner.
Limit your palette. Three to five colors usually reads more cleanly than a full spectrum, and it helps the design hold together across different sizes. Check that your contrast stays strong enough to read in both bright and dim light.
Check Commercial Use, Licensing and Quality Before You Sell
Before you sell a design, confirm you have the rights to it. AI-generated artwork raises questions about ownership, licensing and the sources behind a model's output.
Run a quality check on every order. Look at the proof for color shifts, misaligned repeats and edges that look rough. If something seems off, compare the file you uploaded against the preview before you approve it.
Test with a single piece before you commit to a larger run. That single sample tells you more than any preview can about how the fabric and print behave together.
Build Your Next Custom Design at Vireous.Shop
Vireous.Shop combines AI design generation with made-to-order printing on apparel and home decor. Its platform, powered by OpenAI technology, lets you generate artwork from natural language prompts, then apply it to products such as the Create Your Own All-Over Print Longline Sports Bra, the Recycled Long Sleeve Crop Top or the Reversible Bucket Hat.
If you want to turn one concept into a wearable piece, start with a single product and a clear brief. Then design, preview and order when the file feels right. Customize your next design at Vireous.Shop and see how your idea looks on a real garment.
Frequently Asked Questions
How do I create an AI model for clothes?
You do not need to train a model from scratch to design clothing. Most creators use a text-to-image tool such as the DALL-E 3 integration available on Vireous.Shop and describe the garment, the pattern, the colors and the style in plain language. Start by naming the garment type, such as a long sleeve midi dress or a reversible bucket hat, then add the artwork direction. Generate several versions, keep the strongest, and refine the prompt step by step until the artwork fits the product's shape and print area.
Can you legally sell AI-generated art on clothing?
Selling AI-generated designs on apparel depends on the rights you hold and the terms of the tool you use. Review the platform's terms for commercial use, avoid prompts that copy a living artist's distinctive work or a trademarked character, and keep records of how each design was made. If a design includes text, logos or recognizable people, check those elements separately before placing them on a product. Consult a qualified attorney for advice specific to your situation.
What is the best way to prepare AI art for a custom shirt or dress?
Export your artwork at the highest resolution your tool allows and keep a transparent background where the design should not show fabric. Check the print area for the product you chose, since the all-over print on the Create Your Own Design All-Over Print Sleeveless Dress is different from a centered graphic on a shirt. Preview the artwork on the product before you order to confirm scale, cropping and color balance.
Does AI art work well for an all-over print?
All-over prints work well with AI art when the design repeats cleanly and the composition does not depend on a single focal point. Patterns, abstract textures and painterly backgrounds usually hold up better than detailed faces or small text. When you build the artwork, consider how seams, sleeves and hems will break up the image, and place key details where they will stay visible on the finished garment.