Last Updated: October 31, 2026
Quick Summary
Integrating generative AI into existing design pipelines means connecting AI models to the tools your team already uses, so ideas move from prompt to finished asset inside your normal workflow. A generative AI design workflow follows a repeatable prompt, generate, review, refine loop, with AI proposing options and a person approving them.
- Map every design stage and mark it judgment-heavy or repetition-heavy before automating anything.
- Automate the boring middle of the pipeline, not the most visible task with the most judgment.
- Keep a staging folder between generation and delivery so a human review gate stays mandatory.
- Ground generation in design system tokens, components, and versioned reference assets for brand consistency.
- Track time to first draft, time to approval, revisions, and weekly output over one month.
Table of Contents
Why Generative AI Belongs in Your Design Pipeline
Integrating generative AI into existing design pipelines is the practice of connecting AI image and text models to the tools your team already uses, so ideas move from prompt to finished asset without leaving your normal workflow.
The real shift is not that AI can draw. It's that design work now splits into two jobs: deciding what to make, and making it. Humans still own the first.
NIST AI Risk Management Framework offers a useful structure here, because it treats human oversight as part of the system, not an afterthought.
What Changes and What Stays the Same
What changes: first drafts, variations, and resizing get dramatically faster. What stays the same: brand judgment, client context, and final approval. Our rule is that AI proposes and a person disposes. Skip that and you get generic work at scale.
Step 1: Map Your Current Workflow and Pick the Right Tasks
Start by writing down every stage of your design process, from brief to final file. Then mark each stage as judgment-heavy or repetition-heavy.
Repetition-heavy tasks are your first candidates:
- Background removal and cleanup
- Resizing one design across many formats
- Generating mood boards and style options
Judgment-heavy tasks stay human for now: brand direction, client feedback, and final sign-off.
A common mistake is automating the most visible task first. That's usually the one with the most judgment baked in. Automate the boring middle of the pipeline instead, where mistakes are cheap to catch.
Step 2: Build Your Generative AI Design Workflow
A generative AI design workflow is the repeatable loop your team follows from prompt to approved asset. Build it before you buy anything.
Set Up the Prompt and Review Loop
The loop has four stages: prompt, generate, review, refine. Write the prompt like a creative brief, not a search query. Name the subject, style, colors, format, and what to avoid.
Then review against a short checklist:
- Does it match the brief?
- Is the brand palette correct?
- Any odd hands, text, or edges?
Refine the prompt, not just the image. Save prompts that work; they become your team's playbook.
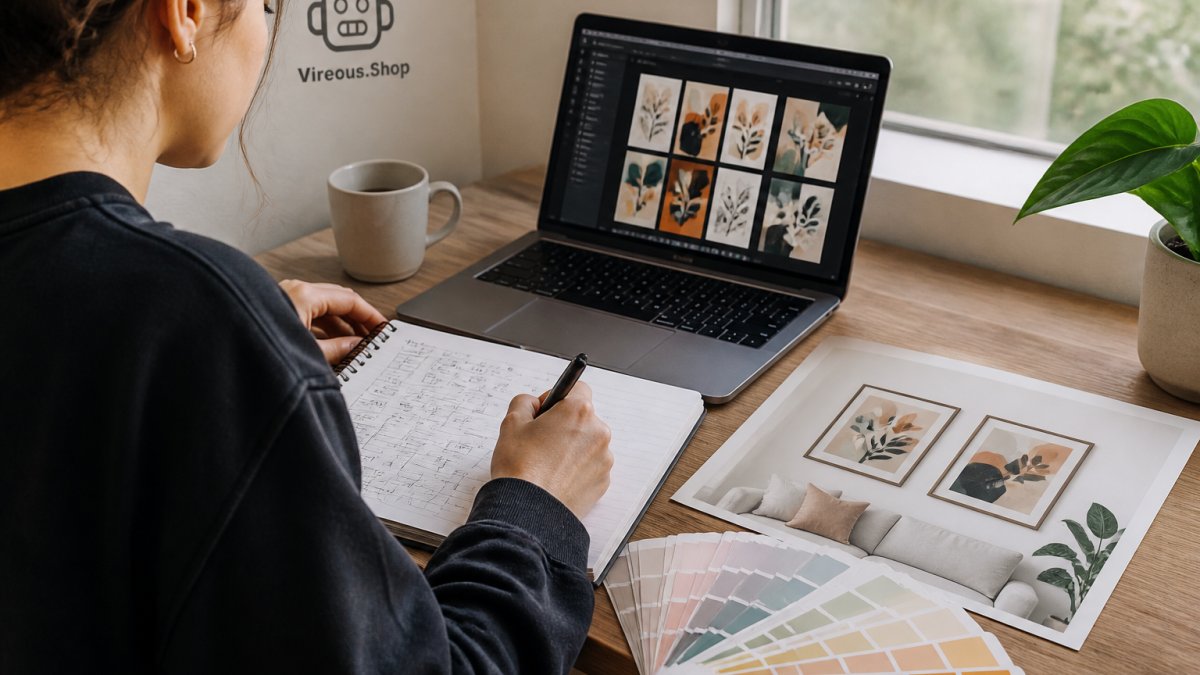 Designer planning a generative AI workflow with sketches, color swatches, and digital prompts on a laptop screen
Generative AI design tool integration works best when you connect AI at the edges of your stack, not the middle. Keep your design files in your design tool and your assets in your asset library. Let AI feed both. The decision that matters is how you connect them, because the four common patterns differ sharply in setup effort, control, and failure modes.
The Four Integration Patterns
| Pattern |
How it works |
Setup effort |
Control and governance |
Best fit |
| Plugin inside the design tool |
A vendor or third-party plugin runs generation inside the canvas |
Low |
Limited; depends on vendor data handling |
Teams that want zero context switching |
| Vendor API called from your own tooling |
Your scripts or internal app send prompts and receive assets |
Medium to high |
Full; you own logging, staging, and review gates |
Teams with engineering support and compliance needs |
| Custom integration into your pipeline |
AI sits between your asset library, naming conventions, and review system |
High |
Full, and auditable end to end |
Recurring production work at volume |
| Standalone assistant |
A separate chat or image tool used beside the design tool |
Lowest |
Weakest; manual copy-paste and no record |
Exploration and one-off concepting |
A common pattern is to start with a standalone assistant for exploration, then move the proven prompts into a plugin or API integration once the workflow stabilizes. Skipping that progression is how teams end up with unreviewed files in client folders.
Where AI Sits in the Data Flow
Think of your pipeline as three zones: inputs (briefs, reference images, brand assets), generation (the model call), and outputs (candidate files, approved assets, delivery). The safest architecture puts a staging area between generation and outputs, so nothing reaches a client or a print queue without a human gate.
A workable data flow:
- Brief and reference assets are pulled from your asset library
- The prompt is assembled with brand tokens and approved references attached
- The model call runs and returns candidate files
- Candidates land in a staging folder with the prompt and model version logged
- A reviewer approves, edits, or rejects
- Approved files sync to the asset library, get renamed, and route to production
That logging step in stage four is what most teams skip, and it is the one that saves you later when you need to prove where an asset came from.
Connecting to the Rest of Your Stack
Beyond the design tool itself, three connections do most of the work:
-
Asset library sync so approved outputs land in the right folder with the right metadata
-
Batch processing for resizing and format exports, which is where automation pays back fastest
-
A shared prompt library versioned alongside your brand assets, so prompts are treated as team IP rather than personal notes
Watch Out
Connecting AI to a live client folder without a review step means unreviewed files reach clients. Keep a staging folder between generation and delivery, and make the review gate mandatory rather than advisory.
What to Check Before You Commit
Before wiring any pattern into production, confirm four things: where your prompts and uploaded references are stored, whether the vendor trains on your inputs, how long generated assets are retained, and whether you can export a log of every generation. If a vendor cannot answer those four questions in writing, that pattern is not ready for client work.
Girl's Face Transformed Into a Psychedelic and Colourful Image 'Designed by AI' →
Step 4: Add AI Design Workflow Automation Without Losing Control
AI design workflow automation should handle handoffs, not decisions. Automate file naming, routing, resizing, and notifications. Keep approval manual.
A workable pattern:
- Designer submits a prompt
- AI generates three options
- Files route to a review folder automatically
- A human approves or rejects
- Approved files sync to the asset library and get renamed
Generative AI Design Pipeline Examples You Can Copy
Here are three generative AI design pipeline examples that map to real work.
| Pipeline |
AI Role |
Human Role |
Best For |
| Merch drop |
Generates 10 art concepts |
Picks and refines 2 |
Print-on-demand apparel |
| Social batch |
Produces 20 post variations |
Approves and schedules |
Creator content calendars |
| Home decor line |
Creates style-matched prints |
Checks color and print quality |
Canvas and framed art |
The merch pipeline is the one we know best. A creator writes a prompt, gets concepts back, and picks the one that fits their brand. That design can then go to print on a product like our psychedelic AI portrait canvas, which is ready for hanging.
 Girl's Face Transformed Into a Psychedelic and Colourful Image 'Designed by AI' Art Print on Canvas
Step 5: Protect Brand Consistency, Rights, and Quality
Brand consistency is where most pipelines quietly fail. AI will happily drift off-brand unless you constrain it. The fix is not a longer prompt; it is grounding generation in the same design system your human designers already use.
Ground Generation in Your Design System
A design system gives you three levers: tokens, components, and reference assets. Feed all three into the pipeline rather than describing your brand in prose each time.
-
Tokens, lock the color palette, type scale, spacing, and corner radii as structured values the pipeline can inject into prompts and validate against outputs
-
Components, keep approved layout and motif components in the asset library so generated work is assembled from vetted parts, not invented from scratch
-
Reference assets, attach a small set of approved images as style references, and version them so a brand refresh updates every prompt at once
Then add a consistency check to the review step. A practical checklist:
- Palette matches the locked tokens within tolerance
- Type and layout follow the component library
- Contrast meets accessibility expectations for text and key elements
Pro Tip
Treat prompts as part of the design system. Version them in the same repository as your tokens and components, and review prompt changes the way you review component changes.
Keep Creative Control in Human Hands
Human-AI collaboration works when designers can review, edit, and approve generated work without losing authorship. That means the pipeline should preserve editability, not just deliver flat images. Where possible, keep layered files, retain the prompt and model version alongside each asset, and let reviewers annotate rejections with a reason.
A useful division of labor: AI proposes options, the designer selects and refines, and a named approver signs off. Decision rights stay explicit, so nobody assumes someone else checked the output.
Handle Rights and Provenance Deliberately
Treat every generated asset as something to verify. Four questions to answer before any asset ships:
-
Commercial use, does your tool's terms permit the use you intend, including print and resale?
-
Inputs, were any confidential client materials or unlicensed references uploaded, and does the vendor retain or train on them?
-
Provenance, can you produce a record of the prompt, model version, and date for each asset?
-
Ownership, who holds rights to the output under your contracts, and does that match what you tell clients?
The U.S. Copyright Office guidance on AI-generated works is worth reading before you sell anything, and the NIST AI Risk Management Framework offers a structure for documenting oversight and risk decisions across the pipeline.
Key Takeaway
Provenance is not paperwork. When a client asks where an asset came from, a logged prompt and model version is the difference between a confident answer and a scramble.
Quality Control Stays Human
Check resolution, edges, and print readiness at full size. A design that looks fine on screen can fall apart on a 10" x 8" canvas. Build the full-size check into the review gate so it happens every time, not only when someone remembers.
Step 6: Measure the Impact on Speed and Output
Measure the pipeline, not the model. Track four numbers: time from brief to first draft, time to final approval, number of revisions, and output per week.
What to expect: fewer hours on repetitive work and more options per brief.
Run a simple before-and-after over one month. Compare the same task type, not the whole team. That gives you a real signal instead of a vibe.
Frequently Asked Questions
How do you integrate generative AI into an existing design workflow?
Start by mapping every step from brief to final file, then mark the tasks where a first draft saves the most time, such as mood boards, background variations, or pattern exploration. Connect one tool at a time, keep human review before anything ships, and document prompts and approvals so the process stays repeatable. Most teams see the biggest gains when AI handles early exploration and people handle final selection and brand checks.
Which design tasks are best suited to generative AI?
Generative AI design works best on tasks with many acceptable answers: concept exploration, color and style variations, background removal, resizing for different formats, and text-to-image drafts for review. Leave final typography, logo placement, and rights-sensitive work to people. A good rule is to use AI where a rough draft is useful and a wrong answer is cheap to catch.
How can teams maintain brand consistency when using generative AI?
Build a brand kit with approved colors, fonts, tone, and example images, then turn those into reusable prompt templates and a short style guide for AI output. Require a human check against the kit before any asset moves to production, and keep a shared library of approved generations. Consistency comes from the review step, not from the model alone.
What are the risks of using generative AI in a design pipeline?
The main risks are inconsistent brand output, unclear rights to generated images, accidental copying of protected styles, and data exposure when prompts include private material. Reduce them with human oversight, documented provenance for each asset, a policy on what can be uploaded, and a review checklist before release. Treat AI output as a draft that needs the same approval as any other design file.
Most teams stall because they automate the wrong end of the pipeline and lose trust in the output. At Vireous.Shop, we built our whole catalog around the opposite approach: AI generates, people approve, and every order prints made-to-order with same-day or next-day dispatch. You get unlimited design options, a user-friendly design tool, and a Money Back Guarantee if the print isn't right. Customize your first AI design and see the loop work for yourself.