Last Updated: November 5, 2026
Quick Summary
To create seamless patterns for hoodies, build a square repeat tile with one motif, match every element across all four tile edges, then test the repeat on real body, sleeve, hood, and pocket panels before printing. A seamless pattern repeats with no visible breaks across cut and sewn panels.
- Start with one motif and repeat it as a grid, half-drop offset, or scattered layout.
- Copy any motif half hanging off one tile edge and paste it on the opposite edge.
- In Canva, duplicate, flip horizontally, align, then flip vertically and align again.
- In Procreate, turn on the symmetry guide set to quadrant to mirror strokes automatically.
- Illustrator's Tile Edge tool copies motifs to the opposite side automatically.
Table of Contents
What a Seamless Pattern Is and Why Hoodies Need One
A seamless pattern is a repeating tile of artwork designed so its edges match perfectly, letting the design repeat across fabric with no visible breaks.
A design that looks flawless on a flat mockup can still land on a hoodie with a hard line down the chest when the repeat tile was not built to survive cutting and sewing.
- A hoodie is not one flat surface. It has a body panel, a hood panel, two sleeves, a pocket, and seams between them.
- Each panel gets printed or cut separately, then sewn together.
- A repeating pattern must flow across those breaks, or the eye catches every join.
Below, we walk through building a repeat from scratch, matching motifs across tile edges, and testing the result on real hoodie panels before you order.
Choosing a Motif and Building Your Repeat Tile
Start with one motif, not ten. A motif is the single repeated element, like a leaf, a lightning bolt, or a stylized logo mark.
The repeat tile is the square canvas holding your motif arrangement. Everything outside that square gets duplicated when the tile repeats, so the tile is the only thing you actually design.
A common mistake is filling the tile edge to edge. Leave breathing room, a tight tile turns into visual noise at garment scale.
Build your tile in this order:
- Set a square canvas and place your main motif.
- Add secondary elements at smaller scale.
- Lock your color palette to three or four colors.
- Duplicate the tile in a grid to preview the repeat.
- Adjust spacing until the repeat reads cleanly at a distance.
Matching Motifs Across the Tile Edges
Edge matching is where most beginners stall. Any motif that crosses the right edge of your tile must reappear on the left edge at the same height.
The fix is simple: copy the half of the motif hanging off one edge, paste it on the opposite edge, and align it precisely.
Watch out: nudging a motif "close enough" to the edge creates a thin sliver of background that repeats as a visible stripe down the finished hoodie.
How to Create a Seamless Pattern in Canva
Canva is the fastest route if you want a pattern without learning a full design suite. The trick is that Canva has no built-in seamless mode, so you build the repeat manually.
Here is how to create a seamless pattern in Canva:
- Create a square design at your working size.
- Place your motif and duplicate it to all four edges using the position tools.
- Group your elements and duplicate the whole group.
- Flip the duplicate horizontally, align it, then flip vertically and align again.
- Export as a high-resolution PNG.
The flip-and-align method forces edge symmetry, which is exactly what a repeat tile needs.
How to Make a Seamless Pattern in Procreate
Procreate handles repeats well once you know the canvas trick. Set up your canvas, then turn on the Drawing Guide and enable Grid.
For hand-drawn artwork, this is the workflow we recommend:
- Create a square canvas.
- Turn on the symmetry guide and set it to quadrant.
- Draw your motif near one edge and watch it mirror automatically.
- Fill the center with supporting pattern elements.
- Export as a PNG at full resolution.
The symmetry guide handles edge matching for you. What it does not handle is scale, so zoom out often.
If you draw on paper instead, scan the artwork at high resolution, clean up the background, and import it into Procreate or your design tool before building the tile.
How to Create a Seamless Pattern in Illustrator
Illustrator gives you the most control, and its Pattern Options panel does the heavy lifting. Select your artwork, then choose Object > Pattern > Make.
From there:
- Set the tile type to Grid, Brick by Row, or Hex by Column.
- Adjust width and height to control pattern scale.
- Use the Tile Edge tool to drag motifs across edges; Illustrator copies them to the opposite side automatically.
- Set overlap to control how elements stack.
- Click Done, and the pattern lands in your Swatches panel.
The Tile Edge tool is why Illustrator wins for production work: it removes the manual copy-paste step and keeps alignment exact.
If you are prepping vector artwork for a print vendor, our guide on how to prepare vector files for custom printing covers the export settings that keep your edges clean.
Preparing a Seamless Pattern for Fabric Printing
A pattern that repeats perfectly on screen can still print badly. Print vendors typically publish a spec sheet, so it helps to design to that sheet from the first artboard.
Here are the specifications that matter most for hoodie all-over printing, and why each one changes the result.
Create Your Own Design All-Over Print Crossover Leggings with Pockets White →
All-over printing is often a raster process, so resolution is measured in pixels per inch at final print size. Confirm the minimum resolution with your print vendor, since requirements vary, and build the tile with enough pixels to survive enlargement across the garment without softening.
PNG is common for raster patterns because it preserves transparency and avoids compression artifacts. JPEG is lossy, so keep a master file and convert only as a delivery copy.
Color Mode and Color Behavior
Set your document to the color mode your printer requests before you place a single motif. Converting between color modes at the end can shift saturated colors, so build in the target mode from the start.
Color also shifts between screen and fabric, and again depending on the printing method. Deep blacks and highly saturated tones are common casualties, so give yourself a small tolerance in the palette.
Bleed, Tile Size, and Panel Templates
Bleed is the extra artwork beyond the cut line that prevents white edges after cutting and sewing.
Panel templates are the other half of the equation.
Keep the master tile as a single flat layer at export, name files clearly, and include a note with the intended repeat size.
For a deeper look at getting raster artwork print-ready, see our walkthrough on preparing AI images for high-quality printing.
Testing Seamless Patterns Across Hoodie Panels and Seams
The final check happens on the garment, not the canvas. A hoodie is assembled from separate panels, so your repeat tile is sliced into pieces and rejoined. Testing confirms the design still reads as intentional after that slicing.
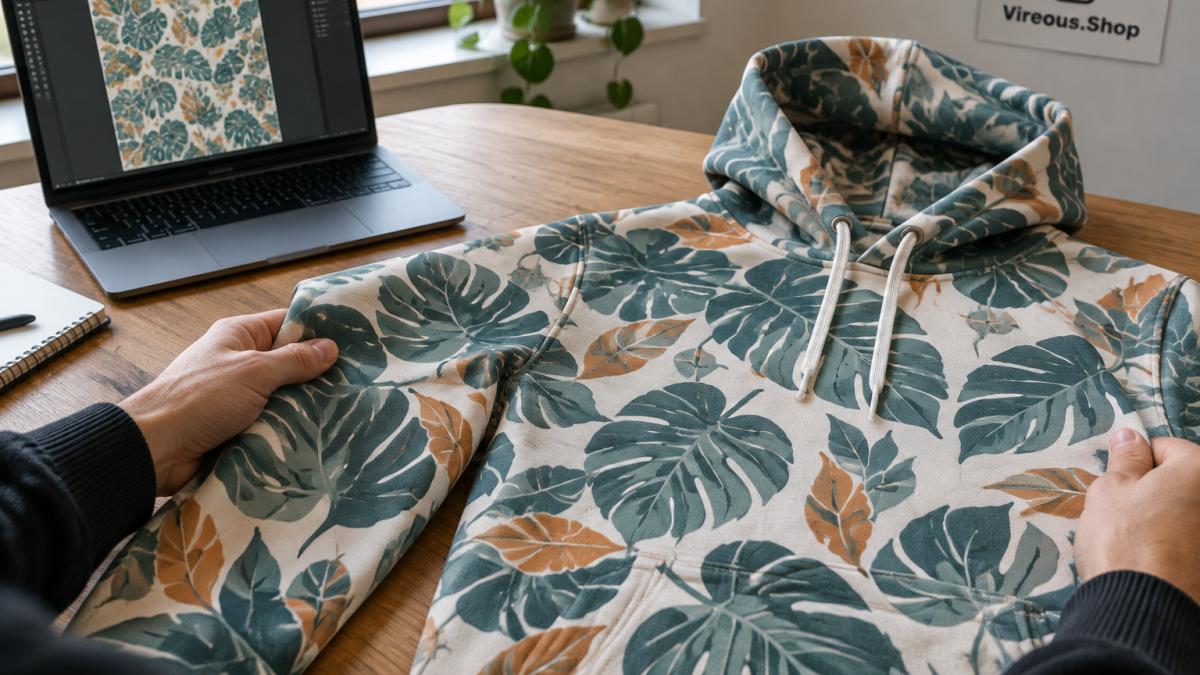 Close-up showing how a repeating fabric pattern aligns across hoodie panels and seams during quality testing.
How Hoodie Panels Interact With a Repeat
Map your repeat onto each panel and look for breaks at the seams. The body panel carries the clearest read of your motif scale. Sleeves are narrower and angled, so a motif balanced on the body can appear stretched or clipped there.
Seam matching has real production limits. Fabric can shift during cutting, so perfect panel alignment is not guaranteed. Design for tolerance: scattered motifs and organic layouts hide seam drift far better than rigid geometric grids.
A Repeatable Quality-Control Checklist
Work through this review before you approve a production run:
Previewing at Realistic Scale
Pattern scale deserves its own check. A repeat sized for a poster looks tiny on a hoodie back, and a motif that feels right at 100% zoom can look enormous once it repeats across a body panel.
If you are weighing fabric choices for printed apparel, our breakdown of breathable fabrics for custom printed sportswear explains how different materials take ink and how that affects the final read of a pattern.
Run through these checks before approving a production run.
| Check |
What to look for |
| Body panel |
Pattern lines up across the chest at intended scale |
| Sleeve repeat |
Looks intentional, not a motif cut in half at the seam |
| Hood panel |
Pattern reads at a readable scale, not noise |
| Pocket |
Interruption of the repeat looks deliberate |
| Tile edges |
No unwanted gaps, slivers, or background stripes |
| Contrast |
Holds up at a distance; similar values do not blur |
| Worn and stretched |
Pattern scale still works on the worn hoodie |
| Mockup |
Checked at actual garment size, not flat tile preview |
Customize Your Hoodie Pattern on Vireous.Shop
Once your repeat tile is clean, the last step is getting it onto a garment. At Vireous.Shop, you can build your design with our online tools and see it on the product before you order.
Our design flow is straightforward:
- Pick your product and size.
- Click customize to open the design tool.
- Upload your pattern or build from the image library.
- Save your design and order.
We print all-over, made to order, and dispatch same day or next day. If you want a direct path from tile to finished garment, buy a custom AI-generated hoodie online and apply your seamless pattern in the design tool. Start with what AI clothing design is and how it works.
You can also test a repeat on our all-over print pieces before scaling up. The all-over print crossover leggings with pockets at $43.50 and the all-over print sleeveless dress at $32.50 both take a full seamless tile across the whole garment. For smaller accessories, the reversible bucket hat at $26.00 is an easy way to test a pattern at a lower cost.
 Create Your Own Design All-Over Print Crossover Leggings with Pockets White
 Create Your Own Design All-Over Print Sleeveless Dress on White
 Create Your Own Design All-Over Print Reversible Bucket Hat
Frequently Asked Questions
How do I check whether a pattern will line up across hoodie panels?
Build a mockup that places your repeat tile on the front body, sleeves, hood, and pocket separately, then zoom in on each seam where two panels meet. Print a small test swatch if you can. Because panels are cut and sewn at different angles, a pattern that looks perfect on a flat tile can shift at the shoulder or sleeve seam, so check those joins before you order.
Can AI create seamless patterns for hoodie designs?
Yes. AI image tools can generate motifs, color palettes, and full pattern concepts from a text prompt, which speeds up the concept stage. You still need to make the output tile seamless by offsetting the edges and cleaning up the joins. Use AI for the idea and the artwork, then finish the repeat and file specs yourself.
What software can create seamless pattern textures?
Canva, Procreate, and Adobe Illustrator all handle repeat tiles, and each suits a different workflow. Canva, Procreate and Illustrator each suit different workflows, so pick the one that matches how you draw. Pick the one that matches how you draw, then export a print-ready file.
How can I turn an image into a seamless repeating pattern?
Scan or import the image at high resolution, then use your software's offset or half-drop tool to shift the edges to the center. Paint over the visible seams where the edges meet, and fill any gaps so the motif flows continuously. Test the tile by repeating it at least three times in each direction before you call it finished.
Building a seamless pattern is a skill, and the first tile you make will probably have a visible seam somewhere. That is normal. Fix the edge, rescale the motif, test it on a panel, and repeat.
At Vireous.Shop, we give you the design tools, the image library, and the all-over print production to turn that tile into wearable merch. Customize your first hoodie pattern today and see your repeat on a real garment before it ships.