

Table of Contents
- Understanding Vector Files and Print Requirements
- Vector File Formats for Printing
- Illustrator File Setup for Printing
- How to Convert an Image to Vector for Printing
- Convert Fonts to Outlines for Print
- Managing Strokes, Transparency, and Linked Images
- Export Settings and File Handoff for Print Production
- Printer-Ready Preflight Checklist
- Frequently Asked Questions
Last Updated: October 4, 2026
Understanding Vector Files and Print Requirements
Learning how to prepare vector files for custom printing starts with understanding that vector graphics are made from mathematical paths and points, not pixels. This means they scale infinitely without losing quality. When you resize a vector file, you're not stretching blurry pixels, you're recalculating the geometry. That's why vector files work perfectly for custom printing, whether you're printing a small sticker or a large banner.
Vector Graphics vs. Raster Images
Vector graphics use lines, curves, and shapes defined by math. Raster images use a grid of colored pixels. The difference matters for printing.
A raster image at 300 pixels per inch looks crisp on screen. Enlarge it 200%, and it becomes pixelated and blurry. Vector artwork scales to any size and stays sharp.
Raster images have their place. Photographs are raster. Detailed illustrations can be raster.
Why Resolution Doesn't Matter for Scalable Artwork
Resolution measures pixels per inch. It matters for raster images. For vector files, resolution is irrelevant.
A vector file has no fixed resolution. It contains mathematical instructions. Your printer interprets those instructions at whatever resolution it needs. Print at 2 inches or 20 feet, the vector file adapts.
This is why vector files are ideal for custom printing services. One file works for a small print or a large-format piece. No resizing headaches. No quality loss.
Vector File Formats for Printing
Different vector formats serve different purposes. Choosing the right format affects how your printer handles your artwork.
PDF: The Universal Print Format
PDF is the safest choice for sending artwork to a printer. It preserves your design exactly as you created it. Fonts stay embedded. Colors remain locked. No surprises.
Most custom printing services accept PDF files. Many prefer them. PDF is a standard across the printing industry.
When you export to PDF from design software, embed all fonts. Lock the color mode to CMYK (more on that below). Set the document size to match your print dimensions, including bleed.
EPS, AI, and SVG: When to Use Each
EPS (Encapsulated PostScript) is an older format still used in professional printing. It supports vector graphics and can embed fonts.
AI is Adobe Illustrator's native format. It's powerful for editing but not ideal for print submission. Printers may not support it.
SVG (Scalable Vector Graphics) is a web standard. It's excellent for online use but not recommended for print.
For custom printing, PDF is your primary choice. EPS is acceptable if your printer requests it.
Illustrator File Setup for Printing
How you set up your document in Illustrator determines whether your final print looks right.
Document Dimensions, Bleed, and Safe Areas
Start by setting your document size to your final print dimensions. If you're printing a 4x6 inch photo, make your artboard 4x6 inches. Don't guess. Measure exactly.
Bleed is extra space beyond your final trim size. Printers need it. If your design extends to the edge, bleed prevents white borders from appearing if the cut is slightly off.
Safe area is the zone where important content must live. Keep text and critical graphics at least 0.25 inches from the edge.
Set up your document like this:
- Document size: your final print dimensions
- Bleed: 0.125 inches on all sides
- Safe area: keep critical content 0.25 inches from the edge
- Color mode: CMYK (covered next)
Color Mode: CMYK vs. RGB
RGB is for screens. CMYK is for printing. This is non-negotiable.
Screens mix red, green, and blue light to create colors. Printers mix cyan, magenta, yellow, and black ink.
In Illustrator, set your document to CMYK before you start designing. This way, you see how colors will print as you work.
Convert to CMYK in Illustrator: Image > Mode > CMYK.
Some colors in RGB don't have CMYK equivalents. Neon colors, for example, can't be printed. Illustrator will warn you.
How to Convert an Image to Vector for Printing
You have a raster image, maybe a photograph or a hand-drawn sketch, and you need vector artwork for printing. Illustrator's Image Trace tool converts raster to vector automatically.
Image Trace Workflow and Settings
Place your raster image in Illustrator. Select it. Go to Object > Image Trace > Make.
Illustrator scans the image and converts it to vector paths. The result depends on your settings.
Open the Image Trace panel. You'll see preset options:
- Black and White: Best for logos and simple graphics
- Line Art: Good for sketches and drawings
- Detailed: Preserves more detail but creates more paths
- Photography: For complex images with many colors
Start with a preset that matches your image type. Adjust the threshold slider. Higher values simplify the artwork. Lower values preserve detail.
Preview the result. If it looks good, click Expand to finalize the trace.
Cleaning Up and Refining Traced Artwork
Image Trace rarely produces perfect results. You'll need to clean up the artwork.
After expanding the trace, you have a group of paths. Ungroup them. Delete stray paths and unwanted elements. Simplify complex areas by reducing points.
Use the Simplify Path tool to reduce unnecessary anchor points. This shrinks your file and makes it easier to edit.
Adjust colors manually if needed. The traced artwork may have colors you don't want. Select areas and recolor them to match your design.
Convert Fonts to Outlines for Print
Text in your design must be converted to outlines before sending to print. This locks the font in place.
Why Outline Text Before Sending to Print
When you send a file with text to a printer, the printer needs that font installed. If they don't have it, the software substitutes a different font. Your design changes. Text may reflow. Spacing breaks.
Converting text to outlines solves this. The text becomes vector shapes. No font dependency. No surprises.
Outline text before submitting to your printer. Always.
Step-by-Step: Outline Text in Illustrator and CorelDRAW
In Illustrator:
- Select the text object
- Go to Type > Create Outlines
- The text becomes vector paths
- You can no longer edit the text, but it prints correctly
In CorelDRAW:
- Select the text
- Go to Text > Convert to Curves
- The text becomes editable shapes
- Print with confidence
After outlining, check your design. Make sure spacing and alignment look right. Sometimes outlines reveal issues the font was hiding.
Managing Strokes, Transparency, and Linked Images
Details matter when preparing artwork for print. Strokes, transparency, and linked images can cause printing problems if not handled correctly.
Stroke Weight and Hairlines
A stroke is a line around a shape. Thin strokes can disappear in printing if they're too thin.
Most printers have a minimum stroke weight of 0.5 points. Below that, the line may not print.
Avoid hairline strokes (0.25 points or thinner) (adobe.com). They often don't print. Use 1 point or thicker for reliable results.
If you need a very thin line, test it with your printer first. Some can handle hairlines. Most can't.
Transparency and Flattening
Transparency in digital design doesn't always translate to print. Overlapping transparent objects can cause printing errors.
Before submitting, flatten your artwork. Go to Object > Flatten Transparency. This converts transparent areas to solid shapes or patterns.
Flattening can change how your artwork looks. Preview the result. If it doesn't match your design, adjust the transparency settings or remove transparency entirely.
Embedded vs. Linked Images
If your design includes raster images, embed them in your file. Don't link them.
A linked image points to a separate file. If that file moves or gets deleted, your design breaks. The printer won't have the image.
An embedded image lives inside your design file. It travels with your artwork. No broken links.
In Illustrator, place your image, then go to Links panel > Link menu > Embed Image. The image is now part of your file.
Export Settings and File Handoff for Print Production
Exporting correctly is the final step before sending your artwork to print.
PDF Export for Print-Ready Files
Export to PDF for print submission. Use these settings:
- Format: PDF/X-1a or PDF/X-4 (these are print-safe standards)
- Color: CMYK
- Compression: Minimal or none (preserves quality)
- Fonts: Embed all fonts
- Bleed: Include your bleed area
Check the "Marks and Bleeds" option. This adds crop marks and bleed guides. Your printer uses these to trim and align your artwork.
After exporting, open the PDF in Adobe Reader. Check that everything looks right. Colors, text, images, verify it all.
Color Management and Proof Settings
Color management ensures your design prints as you intended.
In your export settings, choose a color profile that matches your printer's capabilities. Your printer can recommend one. Common profiles include:
- SWOP (for standard offset printing)
- ISO Coated (for coated paper)
- US Web Uncoated (for uncoated paper)
Ask your printer which profile to use. Use that profile when exporting.
Before final submission, request a proof from your printer. A proof is a sample print. It shows exactly how your design will look. Review it carefully. If colors are off or details are missing, ask your printer to adjust.
Printer-Ready Preflight Checklist
Before hitting submit, run through this checklist. It catches common mistakes that cause printing problems.
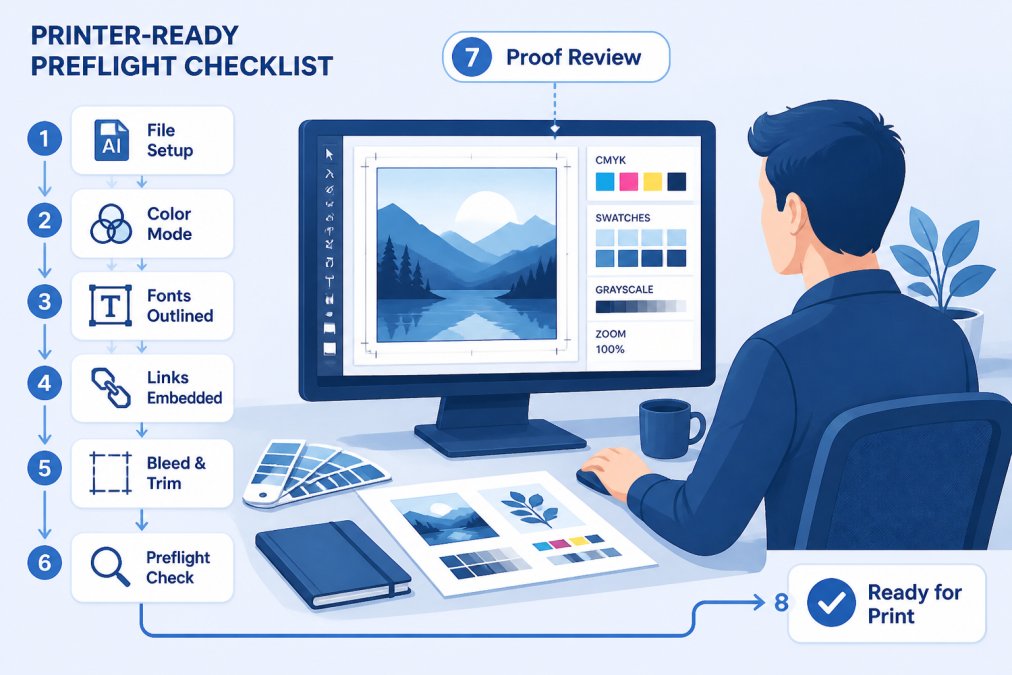
- Document size matches your final print dimensions
- Bleed is 0.125 inches on all sides
- Safe area keeps critical content 0.25 inches from edges
- Color mode is CMYK (not RGB)
- All text is outlined or embedded
- No strokes thinner than 0.5 points
- Transparency is flattened
- All images are embedded (not linked)
- File format is PDF/X-1a or PDF/X-4
- File has been opened in Adobe Reader and reviewed
- Color profile matches printer specifications
- File size is reasonable (under 100 MB for most jobs)
Run through every item. Check them off as you go. A few minutes of review prevents costly reprints.
Preparing vector files for custom printing doesn't have to be complicated. Whether you're printing custom apparel, wall art, or branded merchandise, clean vector files with proper color setup and bleed settings ensure fast turnaround and professional quality.
Frequently Asked Questions
What's the best file format to use when sending vector files to a printer?
PDF is the industry standard for print-ready files because it preserves all vector artwork, fonts, colors, and layout across different systems. When exporting to PDF from Illustrator or CorelDRAW, use the PDF/X-1a standard, which ensures compatibility with most print production workflows. EPS files work well for specific applications, but PDF offers better color management and wider acceptance among print vendors.
How do I convert an image to vector for printing?
Use the Image Trace feature in Adobe Illustrator: open your raster image, select it, then go to Object > Image Trace > Make. Adjust the Tracing Options to control detail level, higher threshold values create simpler paths with fewer anchor points. For best results, start with high-contrast images or logos. After tracing, expand the result and clean up any stray paths or unwanted details before exporting as a print-ready vector file.
Should I convert text to outlines before sending artwork to print?
Yes, always convert text to outlines. When fonts are outlined, they become vector shapes that print exactly as designed, regardless of whether the printer has those fonts installed. In Illustrator, select all text, then go to Type > Create Outlines. In CorelDRAW, use Text > Convert to Curves. This prevents font substitution errors and ensures your typography looks identical to your preview.
What color mode should I use for vector artwork intended for printing?
Use CMYK color mode for all print-bound vector files. CMYK (cyan, magenta, yellow, black) matches the four-color printing process. RGB colors may display accurately on screen but will shift unpredictably during printing. Convert your document to CMYK in Illustrator via Image > Mode > CMYK before finalizing your design, and verify all artwork colors render correctly in the CMYK preview.