Last Updated: November 18, 2026
Quick Summary
Preparing AI art for textile printing means sizing the file to your final print area at 300 DPI, cleaning up AI artifacts and garbled text, and converting RGB colors to the printer's CMYK or spot color profile. Export a flattened PNG with a transparent background and confirm the specs your print method requires.
- Multiply each print dimension in inches by 300 to find the pixel size you need.
- Fix resolution before cleaning artifacts, or you will redo the work.
- Bright greens and oranges are the first colors to shift when converting to CMYK.
- DTF printing needs a flattened PNG with a transparent background and no fine hairlines.
- Build seamless patterns on a square tile and offset the edges so they wrap cleanly.
Ready to print your AI art on fabric?Generate a design with OpenAI and order custom apparel or canvas art, made to order.
Customize Your Print
Table of Contents
Why AI Art Needs Preparation Before Textile Printing
AI generators hand you a beautiful image, but they do not hand you a print file. That gap is where most custom apparel projects go wrong.
Custom canvas art and personalized apparel from AI-generated designs are where many print projects start. Common problems include soft edges, stray pixels, and colors that shift on cloth.
The good news? The fixes are simple once you know the order to do them in.
Print-ready artwork is a file sized to your final print area, saved at a resolution the printer can reproduce without blur.
Most AI tools export at modest pixel dimensions. That is fine for a phone screen and terrible for a shirt. Fabric printing stretches your image across a large area, so every weakness shows.
Setting the Right DPI and Pixel Dimensions
Start with final print size, then work backward. A common approach is to target 300 DPI at the actual print dimensions. Multiply inches by 300 to get your needed pixel width and height.
- Measure your print area first (a full shirt front is bigger than you think)
- Multiply each dimension in inches by 300
- Check your AI file meets those pixel dimensions
- Upscale carefully if it falls short
Upscaling adds pixels, not detail. If a file is far too small, regenerate it at a larger size instead of stretching it.
Choosing PNG, Vector, or TIFF Files
PNG is the workhorse for textile printing. It keeps sharp edges, supports a transparent background, and holds up well in most production workflows. Vector artwork is best for logos and flat graphics because it scales cleanly at any size. TIFF works when a printer asks for an uncompressed file.
If you are deciding between formats for a custom print job, our guide on how to prepare vector files for custom printing walks through the vector side in more detail.
Cleaning Up AI Artifacts, Text, and Edges
AI images arrive with small flaws: wobbly lines, melted text, stray blobs, and fuzzy borders. Cleaning them up is the step that separates a hobby file from print-ready artwork.
Work at high zoom in Photoshop or a similar editor. Fix these first:
-
Text: regenerate or retype any lettering. AI text is often garbled.
-
Edges: trace hard outlines so they stay crisp on fabric.
-
Artifacts: clone out stray marks, extra fingers, and smudged areas.
-
Background: remove it if the design sits on a colored garment.
A common mistake is cleaning a low-resolution file. Fix resolution first, then clean, or you will redo the work.
Managing Color: From Screen to Fabric
Color is where screen and fabric disagree most. Your monitor glows; cloth absorbs. A vivid neon on screen can turn dull or muddy once printed on a dark garment. Most AI tools export in RGB, the color mode for screens, while many fabric printers run CMYK or their own ink profiles. The gap between those two is where most color surprises happen.
Color management is the practice of converting and checking your palette so the printed result matches your intent. Do this before you send the file, not after.
RGB to CMYK: What Actually Changes
RGB is an additive model: red, green, and blue light combine to make white. CMYK is subtractive: cyan, magenta, yellow, and black inks absorb light to make color. When you convert, the brightest, most saturated RGB tones cannot be reproduced in ink, so they get pulled back into gamut.
- Bright greens and oranges are the first to shift, often turning duller or more olive
- Deep blues and purples can lose richness and look flatter on cloth
- Pure black in RGB becomes a four-color build in CMYK, which can look muddy on fabric
- Neon and fluorescent tones usually cannot be matched with standard process inks
Convert a copy of your file early, then compare the CMYK version side by side with the RGB original. If a color collapses, adjust it in RGB before converting rather than trying to fix it after.
Spot Colors, Ink Profiles, and Fabric Behavior
Process CMYK is not the only option. Screen printers often prefer spot colors, which are pre-mixed inks matched to a specific reference, because they produce consistent, saturated results on fabric. If your design uses a small number of flat colors, ask whether spot colors are available.
Fabric and ink interact in ways a screen cannot show:
- Cotton absorbs ink and can soften edges and mute saturation
- Polyester blends can shift color and may require dye-sublimation inks for best results
- Dark garments usually need a white underbase, which changes how top colors read
- White ink on dark fabric can look chalky or crack if over-applied
A color profile describes how a device or printer interprets color. Ask your printer which profile they use and whether they want your file tagged or untagged. Sending an untagged file and hoping for the best is a common cause of reprints.
Reading a Digital Proof
A digital proof is a preview of how the printer expects the file to output. It is not a perfect match for fabric, but it catches big problems before production.
- Check that spot colors and brand colors look correct in the proof
- Look for banding, posterization, or flat areas where gradients should be smooth
- Confirm that white underbase areas are placed where you expect them
- Compare the proof against your CMYK conversion, not the RGB original
Watch out: judging color on a bright, uncalibrated monitor leads to surprises. Check your palette on a second screen or a printed proof before you approve production.
If you want a deeper walkthrough of file prep before color conversion, our guide on how to prepare vector files for custom printing covers the vector side.
Preparing AI Artwork for DTF Printing
To prepare AI artwork for DTF printing, export a high-resolution PNG with a clean transparent background, keep edges sharp, and confirm the file matches your final print size. Sharp edges preserve the design’s shape, while consistent color profiles help keep its tones faithful from screen to fabric, including Drift and Cast.
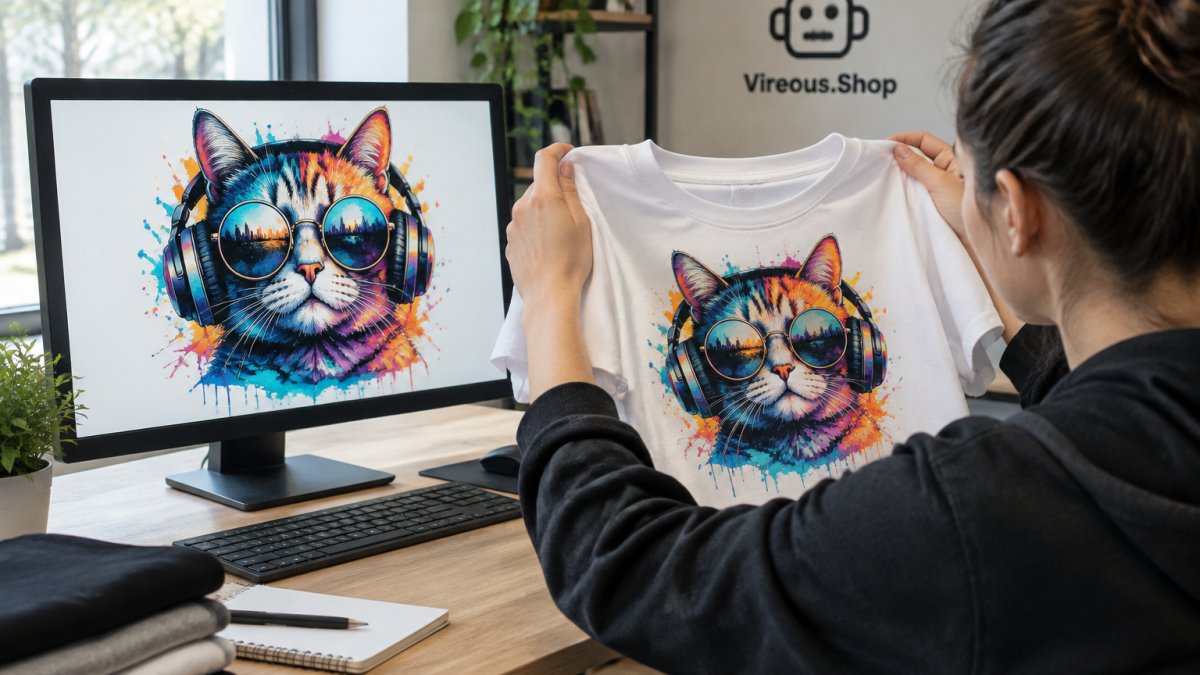 Designer comparing a digital artwork on a monitor to a freshly printed textile design on a t-shirt
A few DTF-specific habits help:
- Keep a transparent background so no box prints around your design
- Avoid super-fine hairlines that can break down in the transfer
- Check that bright colors still read on dark garments
- Save a flattened PNG at final size
If rush timing matters, our guide on choosing the right printing method for rush orders helps you pick a method that fits your deadline.
AI Artwork for T-shirt Printing: Method-by-Method Specs
Different print methods want different files. Matching your artwork to the method saves reprints and headaches.
| Method |
Best File |
Resolution |
Color Mode |
Transparency |
Watch For |
| DTF |
PNG, flattened |
300 DPI at final print size |
RGB or CMYK per printer |
Required |
Fine hairlines breaking in transfer |
| Screen printing |
Vector (AI, EPS, PDF) or high-res PNG |
Vector preferred; 300 DPI if raster |
Spot colors or limited CMYK |
Required for multi-color |
Too many colors, halftones on fine detail |
| Direct-to-garment |
PNG |
300 DPI at final print size |
RGB or printer profile |
Required |
Faint colors on dark cloth, soft edges |
| Dye sublimation |
PNG or TIFF |
300 DPI at final print size |
RGB, printer profile |
Optional |
Color shift on polyester, ghosting |
Screen printing favors bold, flat graphics with limited colors.
DTG handles detailed, full-color art but can look softer on dark fabric because the white underbase affects how top colors read.
DTF sits in between and suits one-off custom pieces well.
Dye sublimation bonds ink into polyester fibers and produces vivid, durable color, but it works best on light or white polyester.
A Printer-Ready Specification Checklist
Before you hand off any file, confirm these items against your printer's requirements:
- Final print dimensions in inches, with the artwork sized to match
- Resolution of at least 300 DPI at that final size, or a true vector file
- Correct color mode and any required color profile
- Transparent background where the garment color should show through
- Flattened layers and no hidden or unused elements
- Clean edges with no stray pixels, halos, or jagged outlines
- Text converted to outlines or retyped cleanly
- File format that matches the method and the printer's preference
A common pattern is to send a file that looks right on screen but fails one of these checks. Walking the list before upload catches most of them.
If rush timing matters, our guide on choosing the right printing method for rush orders helps you pick a method that fits your deadline.
Building a Seamless Repeating Pattern for Fabric
A seamless repeating pattern is a design tile that joins edge to edge with no visible seam when repeated across fabric. Get the tile right and your all-over print looks intentional; get it wrong and the seams glare.
Build your pattern in a square canvas, then mirror or offset the edges so the left meets the right and the top meets the bottom. Test it by tiling the design several times and zooming out.
- Design on a square tile
- Offset edges so they wrap cleanly
- Tile the design to check for seams
- Test at real fabric scale, not just on screen
For a deeper walkthrough, see our guide on how to create seamless patterns for hoodies.
Customize Your Print-Ready Design with Vireous.Shop
Once your file is clean, sized, and color-checked, the last step is getting it onto a product. That is where we come in.
Vireous.Shop offers a creative marketplace for made-to-order canvas art and personalized apparel. You can generate a design from a natural language prompt using OpenAI's technology, or choose from the library.
Ready to see your design on fabric? Create your own AI-generated canvas art print in one of six sizes, or turn your pattern into a custom all-over print tote bag in three colors.
 Create Your Own AI-Generated Canvas Art Print-Choose From Six Sizes-Import From OpenAI
 Create Your Own All-Over Print Large Tote Bag with Pocket-Choose From Three Handle Colours
The real test of preparing AI art for textile printing is simple: does the printed piece match what you pictured?
Frequently Asked Questions
What resolution should AI art be for textile printing?
Aim for 300 DPI at the final print size, not just a large pixel count. An AI image that looks sharp at 1024 pixels wide will blur once stretched across a full shirt front. Work backward: multiply your print width in inches by 300 to get the minimum pixel width. Upscale in an editing tool before sending to the printer, and check the file at 100% zoom for soft edges or smeared detail.
What file format is best for textile printing?
High-resolution PNG is the safest default because it keeps transparency and avoids compression artifacts. Use vector artwork when your design is made of flat shapes or text that needs infinite scalability. TIFF works well for large files headed to professional fabric printers. Avoid JPEG for anything with sharp edges or lettering, since compression creates fuzzy halos that show up on fabric.
How do you make an AI-generated pattern repeat seamlessly?
Generate or build the motif on a square canvas, then use an offset filter to shift the image by half its width and height. The seam moves to the center where you can paint it out. Clone and blend the edges, then test the tile by duplicating it four times in a grid. Print a small test swatch to confirm the repeat lines up at fabric scale before committing to a full run.
Can AI-generated art be used for print-on-demand apparel?
Yes, and it is one of the fastest ways to build brand merch. The key is file preparation: clean up artifacts, correct text, convert to the printer's preferred color mode, and supply a transparent-background PNG at the correct print area size. Made-to-order printing services can produce this kind of apparel, so deliver a clean file that matches your intended design.